Elevate your art journal with a burst of color and texture! In this tutorial, we’ll create a layered floral page using a mix of acrylic paints with a cute wooden circle piece that says, “Bloom where you are planted.” From creating a layered background to the final splatter details, this guide will walk you through each step, ending with a high-gloss seal that brings your page to life.
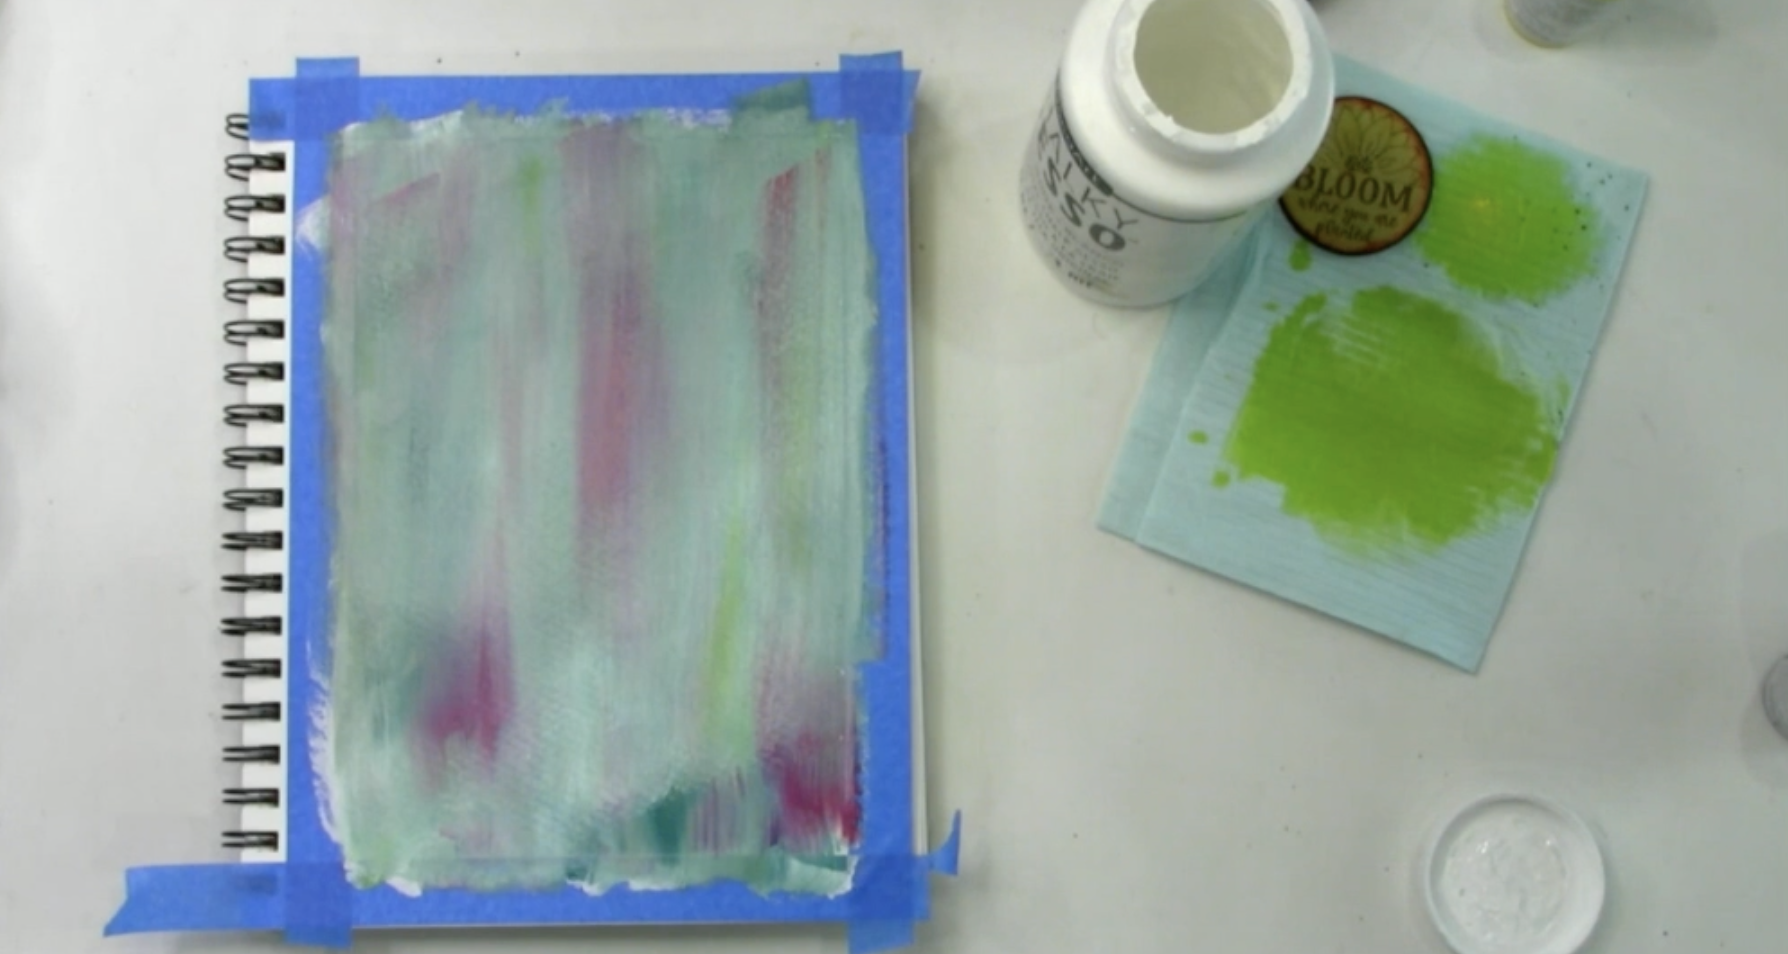
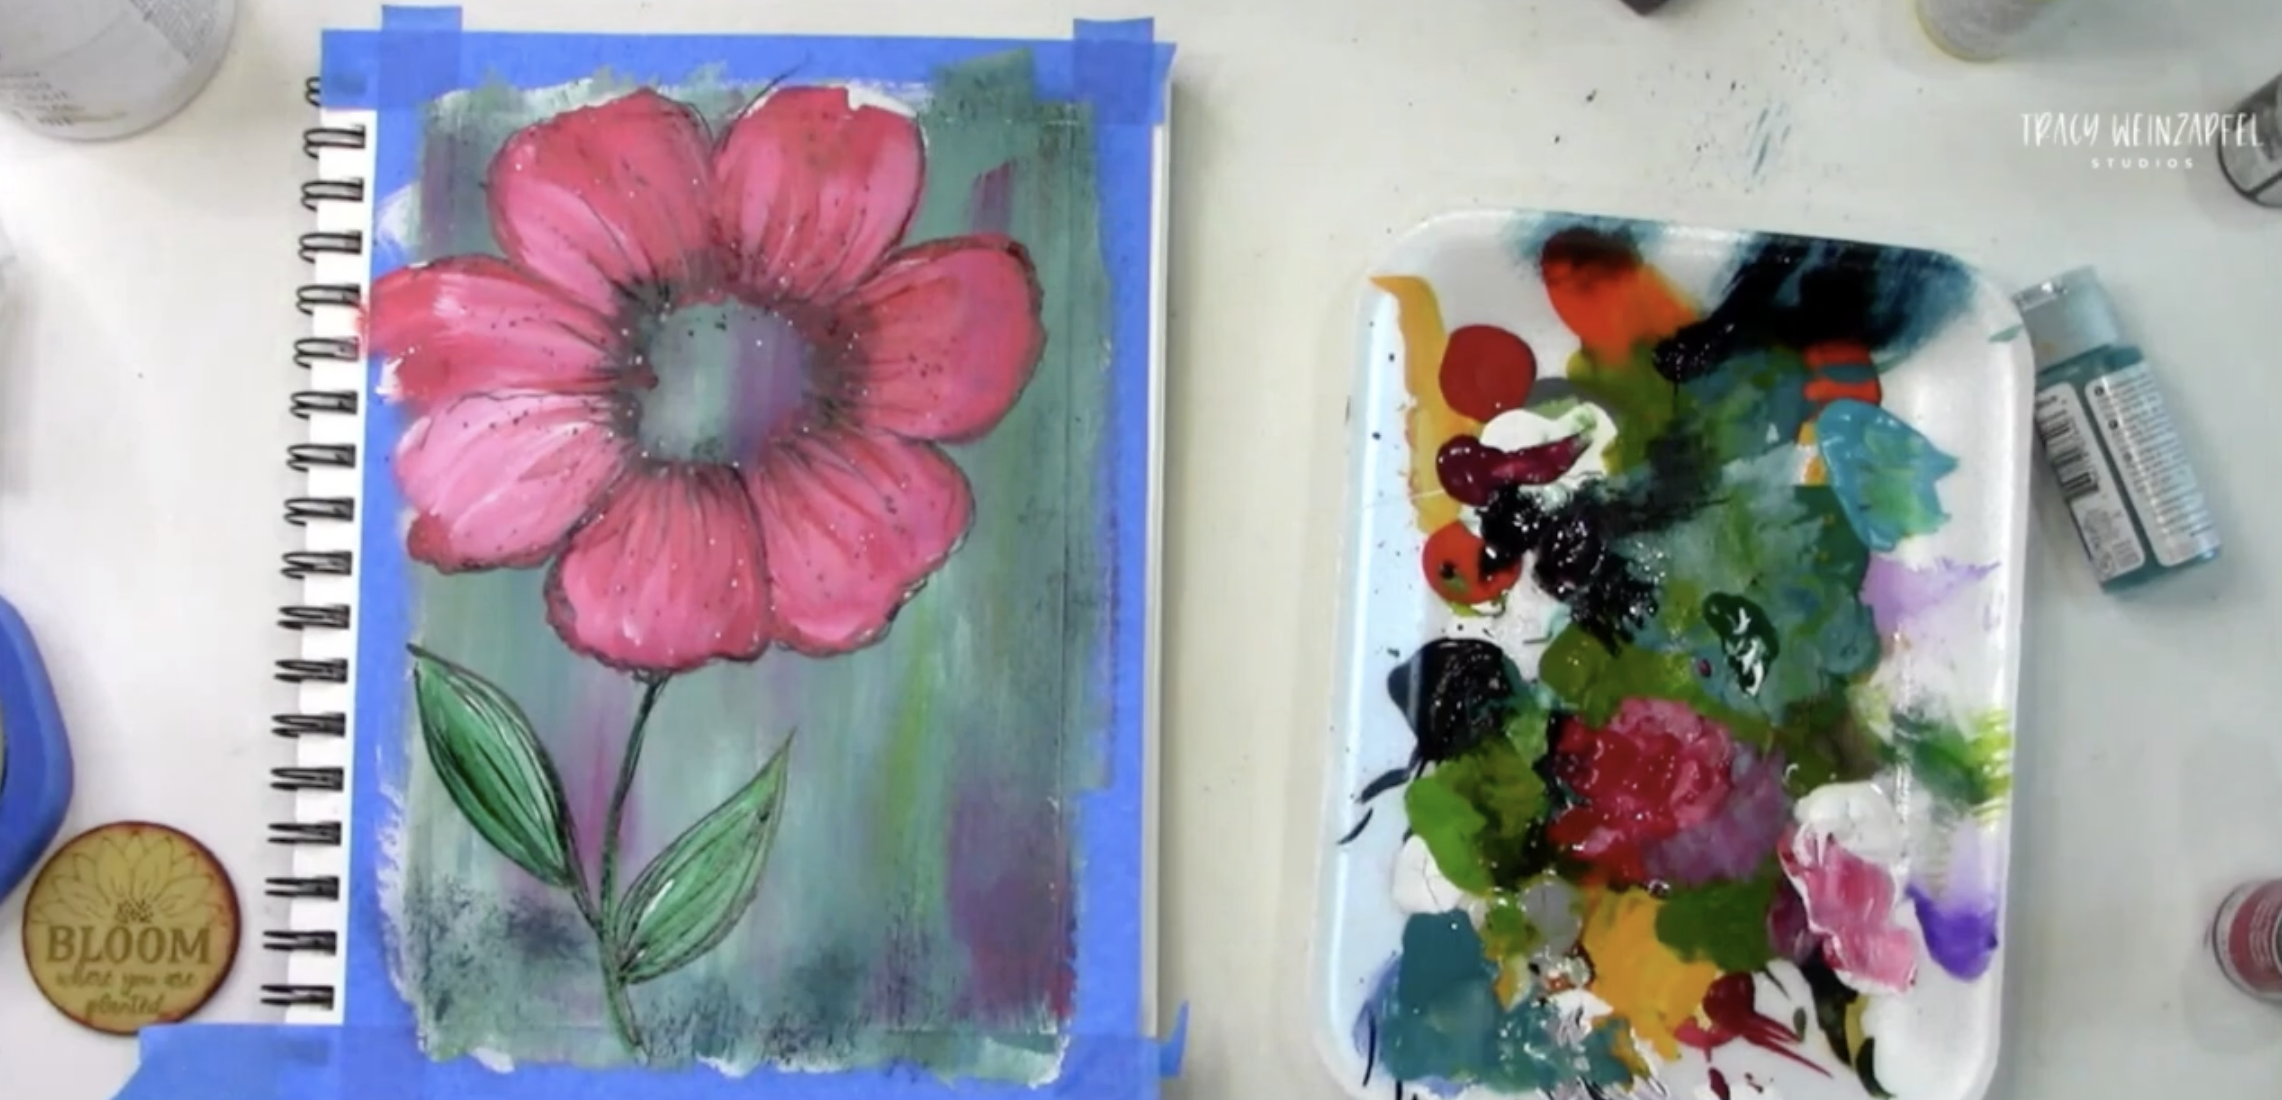
To prepare your art journal page, start by taping off the edges with painter’s tape. Apply a coat of white gesso across the entire page as a base.
Then, while the gesso is still damp, brush on Cobalt Turquoise Hue, Green Gold, and Primary Magenta in vertical strokes to create a layered background. Dry the page with a heat tool to set the colors.
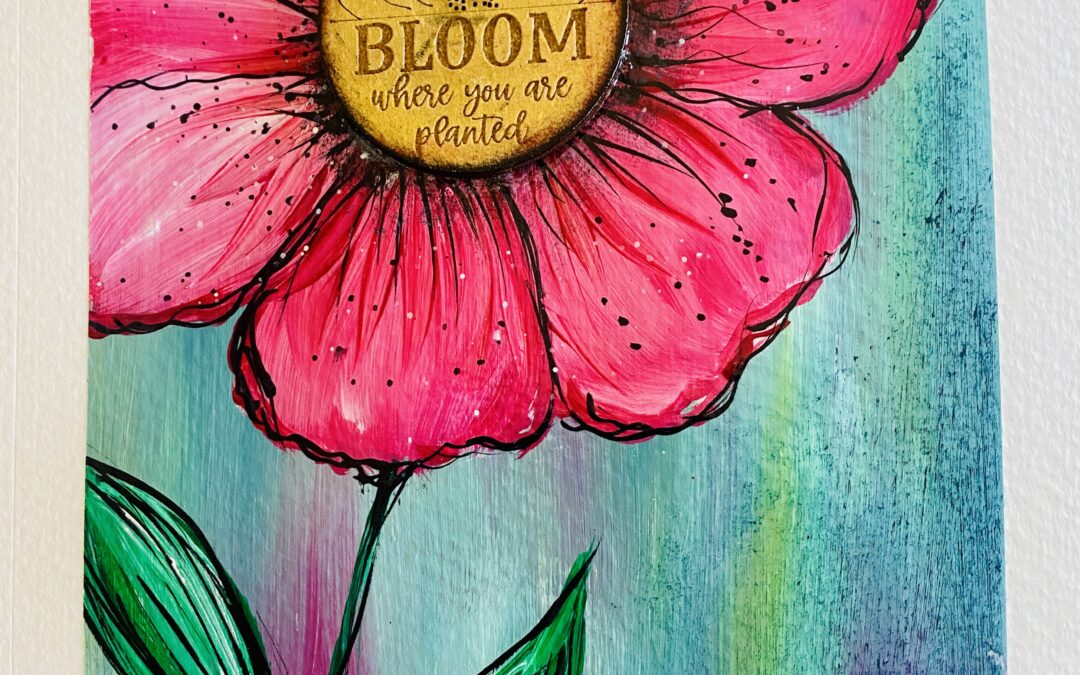
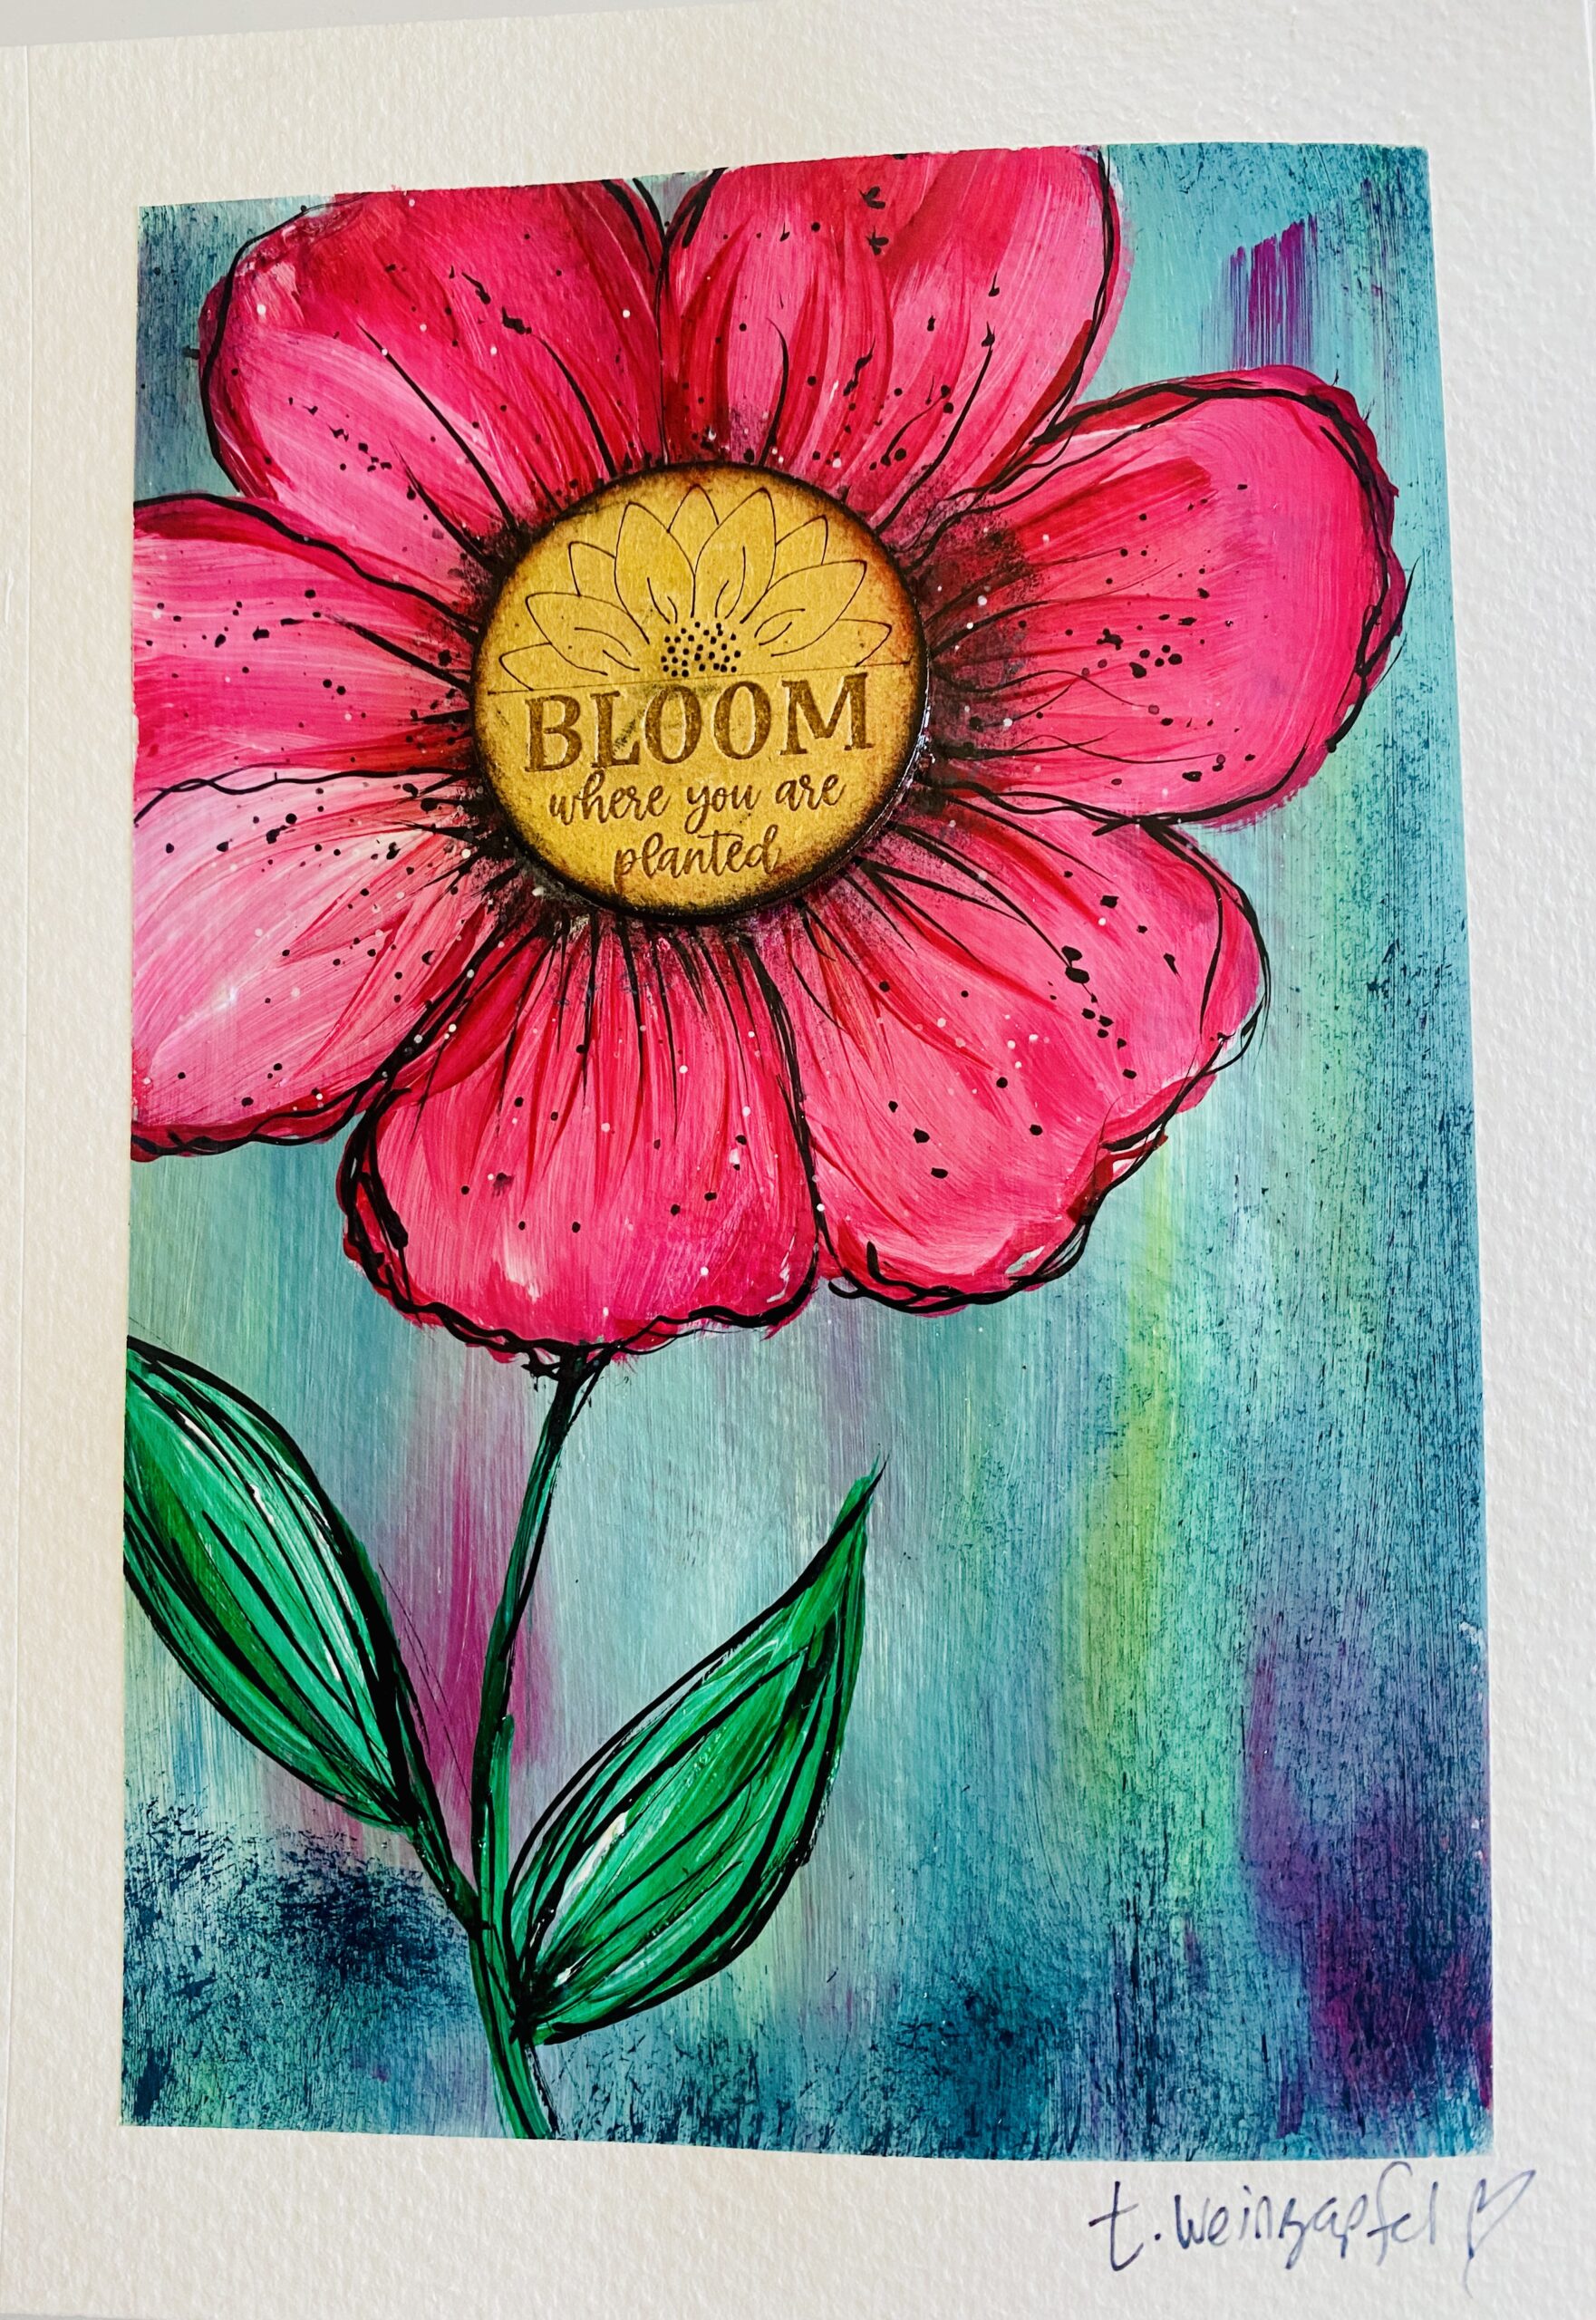
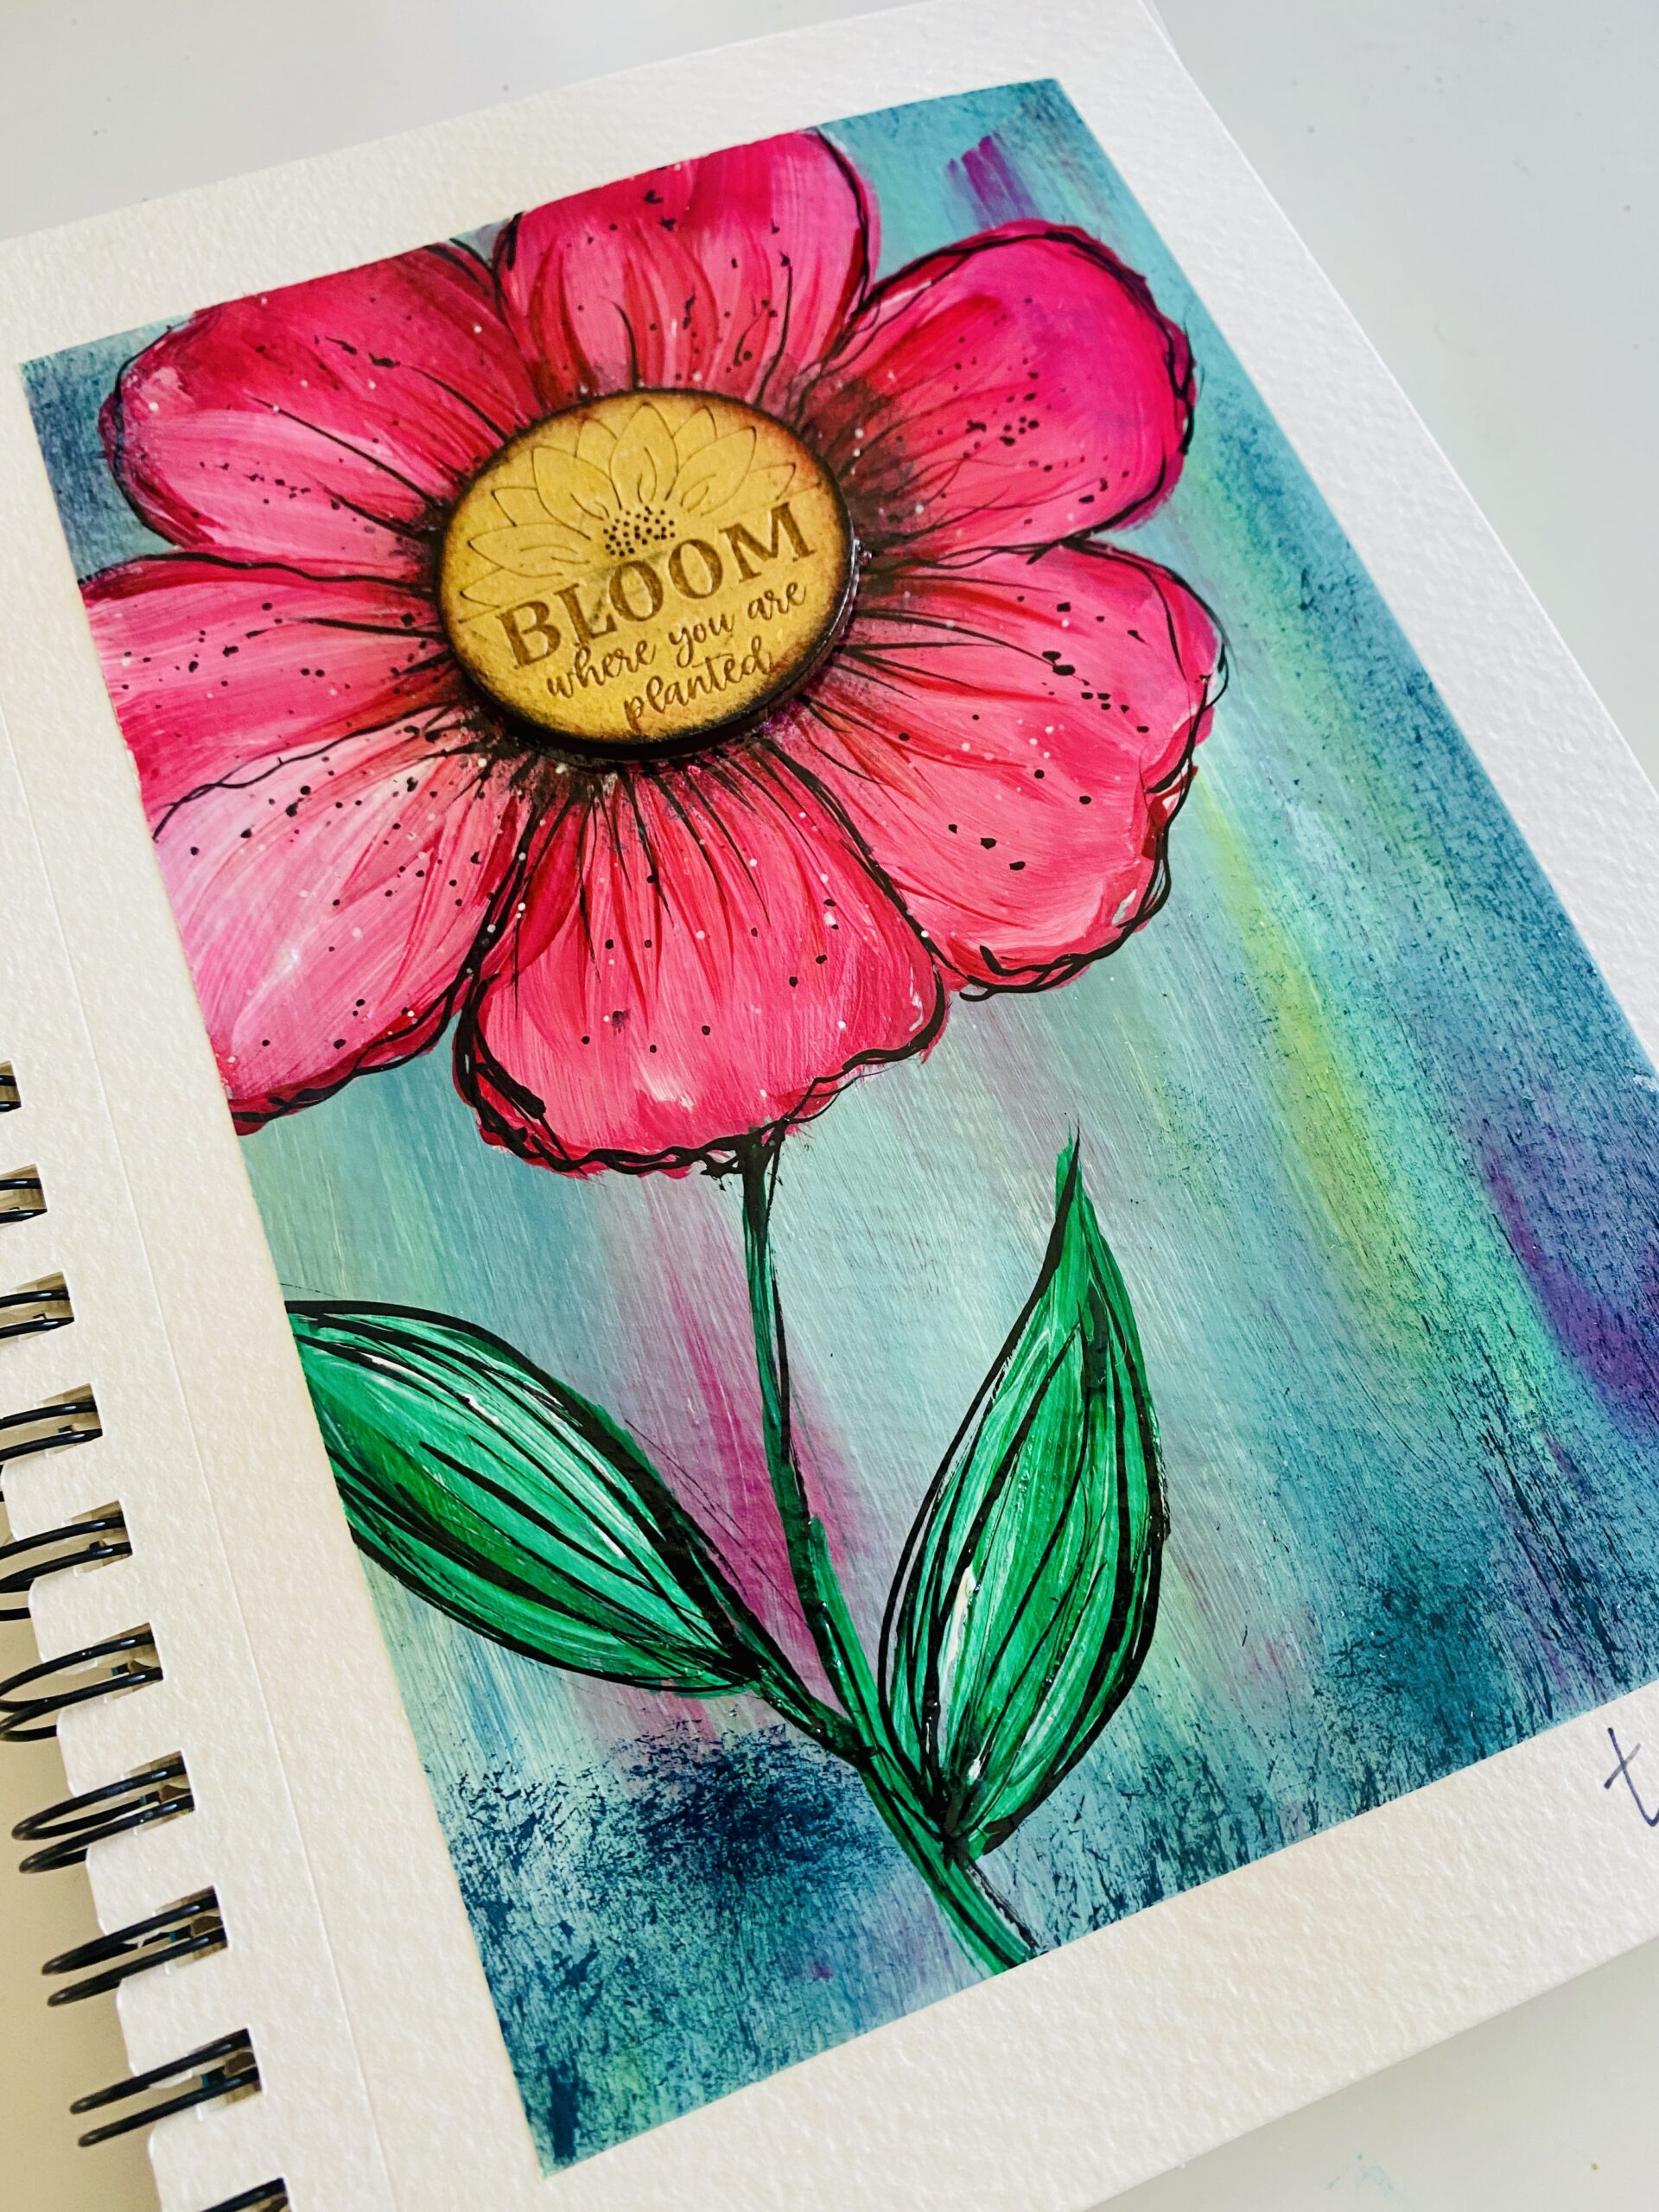
For the focal point, I’ll be using a wooden circle with the words “Bloom where you are planted” as the flower center. To give it a soft yellow tint, mix a little water with Primary Yellow paint and brush it over the wooden circle, then gently wipe off the excess. I’ll also add extra depth around the edges using a black ink pad.
Position your wooden circle on the page as a guide, and lightly trace it with a pencil so you know where to add the petals. Paint the petals with a layer of white gesso, then apply Primary Magenta over the top. Blend in a bit of white paint to add dimension and depth to the petals. Use a heat tool to dry the layers completely.
Use a liner brush with green paint to add the stem and leaves, blending in some white paint for highlights. Dry again.
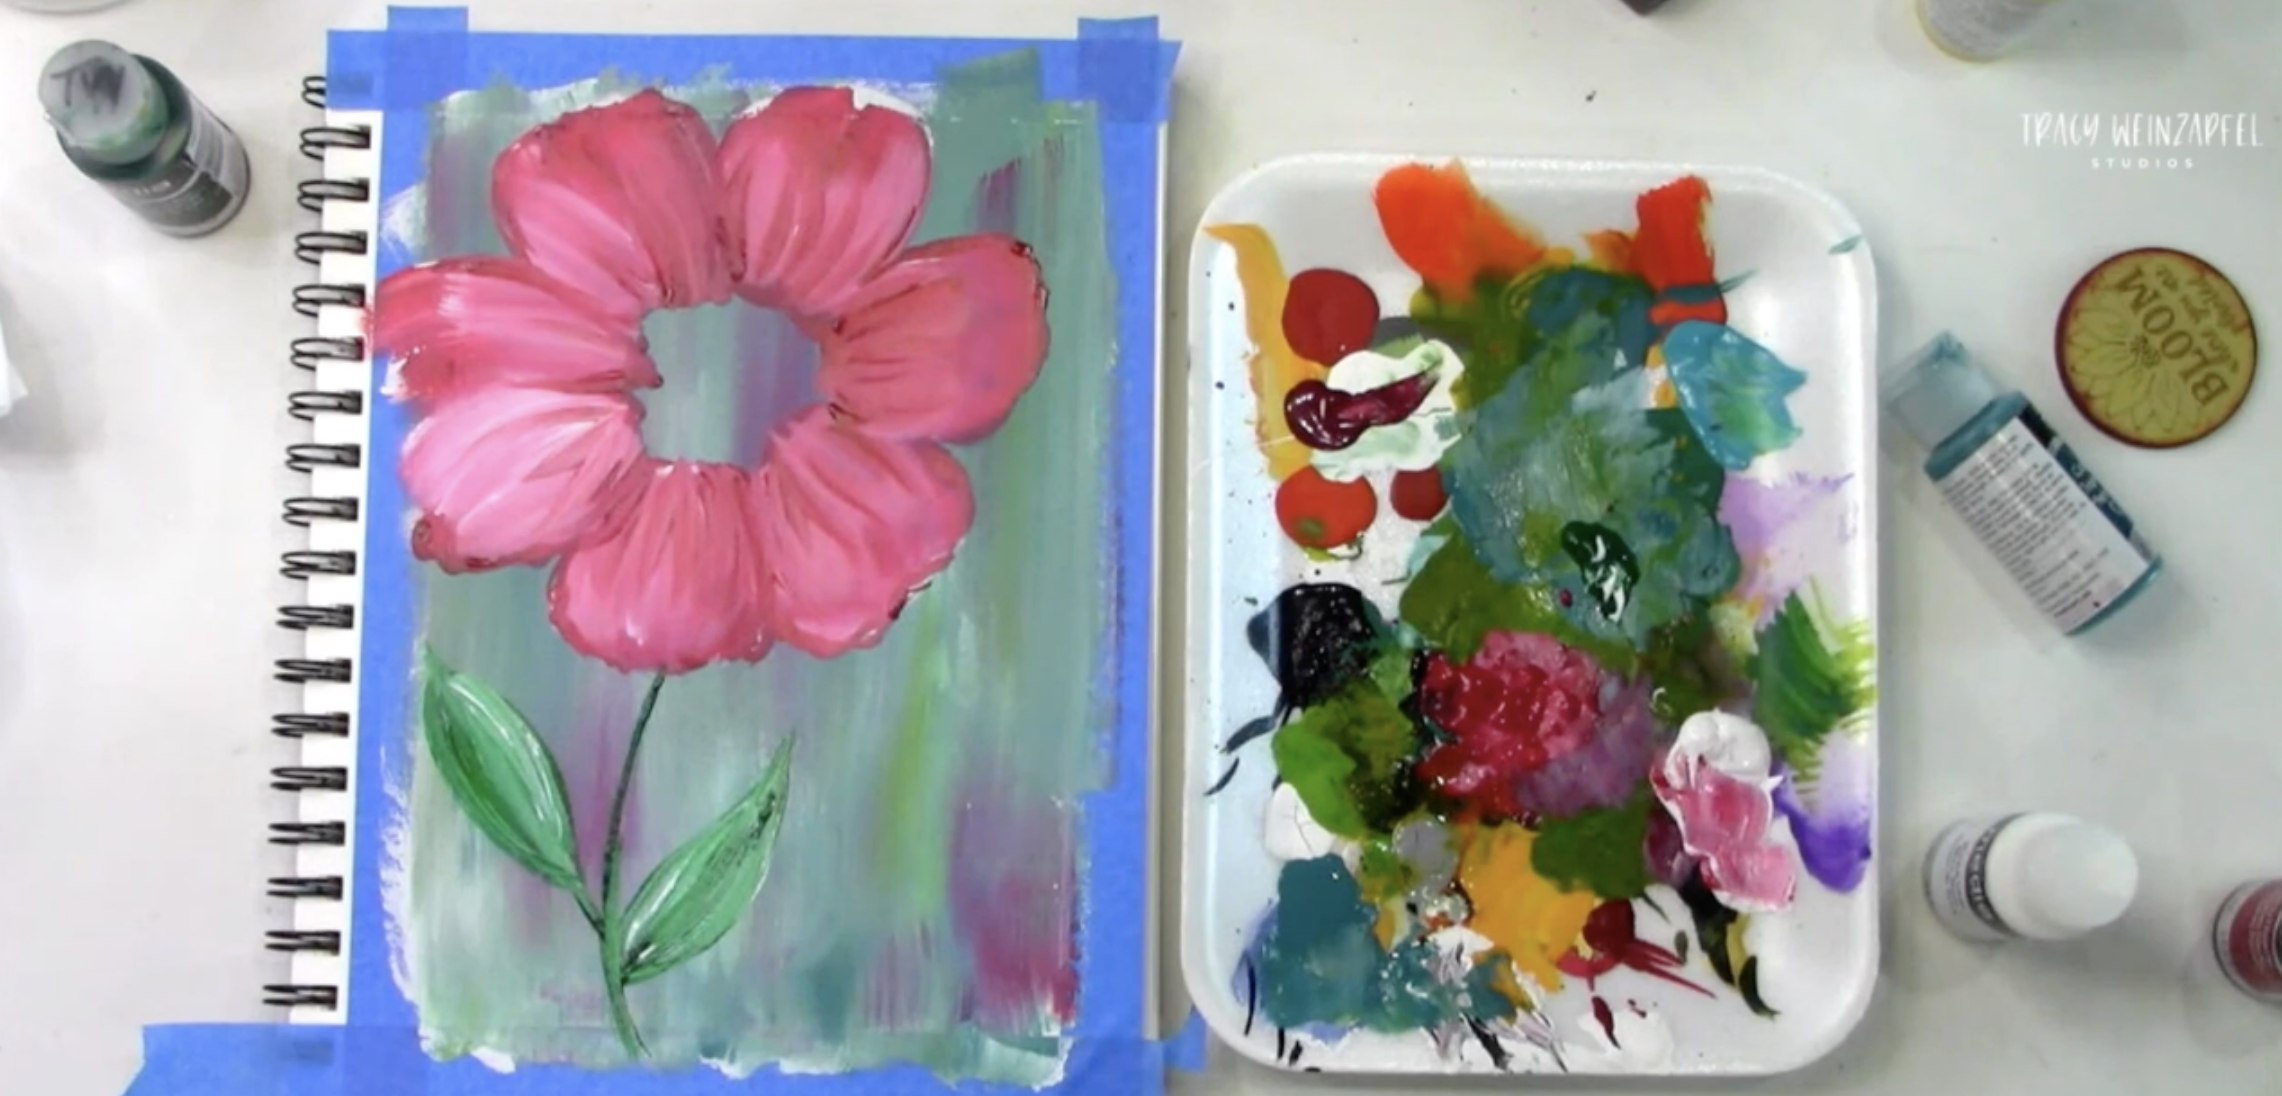
With a dry chip brush, apply Prussian Blue Hue around the edges of your page.
Next, use a liner brush and black paint (or a paint pen if you prefer) to outline the flower petals and leaves, adding texture lines for detail. With a small stencil brush, lightly dab black paint around the flower center for added depth.
For a splatter effect, mix a little water with white acrylic paint, dip a fan brush in the mixture, and tap it gently above the page to create soft speckles. Repeat with black paint. Finally, dry everything thoroughly with a heat tool.
Glue the wooden circle to your flower center. Then, apply a coat of High Gloss sealer with a paintbrush to your entire page, including on top of the wooden circle. Remove the painter’s tape and let your art piece dry and cure.
Watch the replay below!
Thank you for joining in on the creative fun. Join us LIVE every Wednesday at 5:30 pm PST on Facebook at Tracy Weinzapfel Studios.
Join the waitlist for Your Artful Journey! This is my exclusive creative membership where you can explore the world of art journaling! Join a community of support and inspiration with interactive art sessions full of tips and tricks, conversation, Q & As, and most of all, FUN!
Supply List:
- 7 X 10 Watercolor Journal
- Painter’s Tape
- Gesso: DecoArt (White)
- Acrylic Paint: DecoArt Americana: Titanium White, Carbon Black, Cobalt Turquoise Hue, Primary Magenta, Green Gold, Primary Yellow
- Brushes: Dynasty
- Black Stamp Pad: Dare 2b Artzy
- Circle of Words Inspiration Set
- Sealer: DecoArt High Gloss
Tracy’s Resources Page and visit Tracy’s Shop