
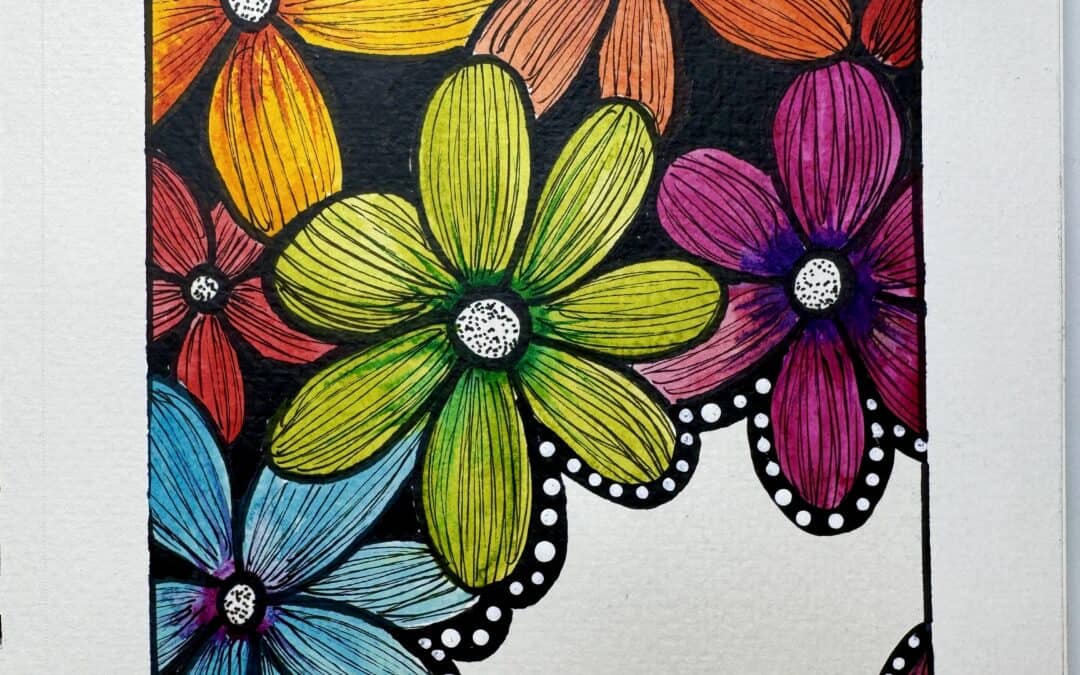
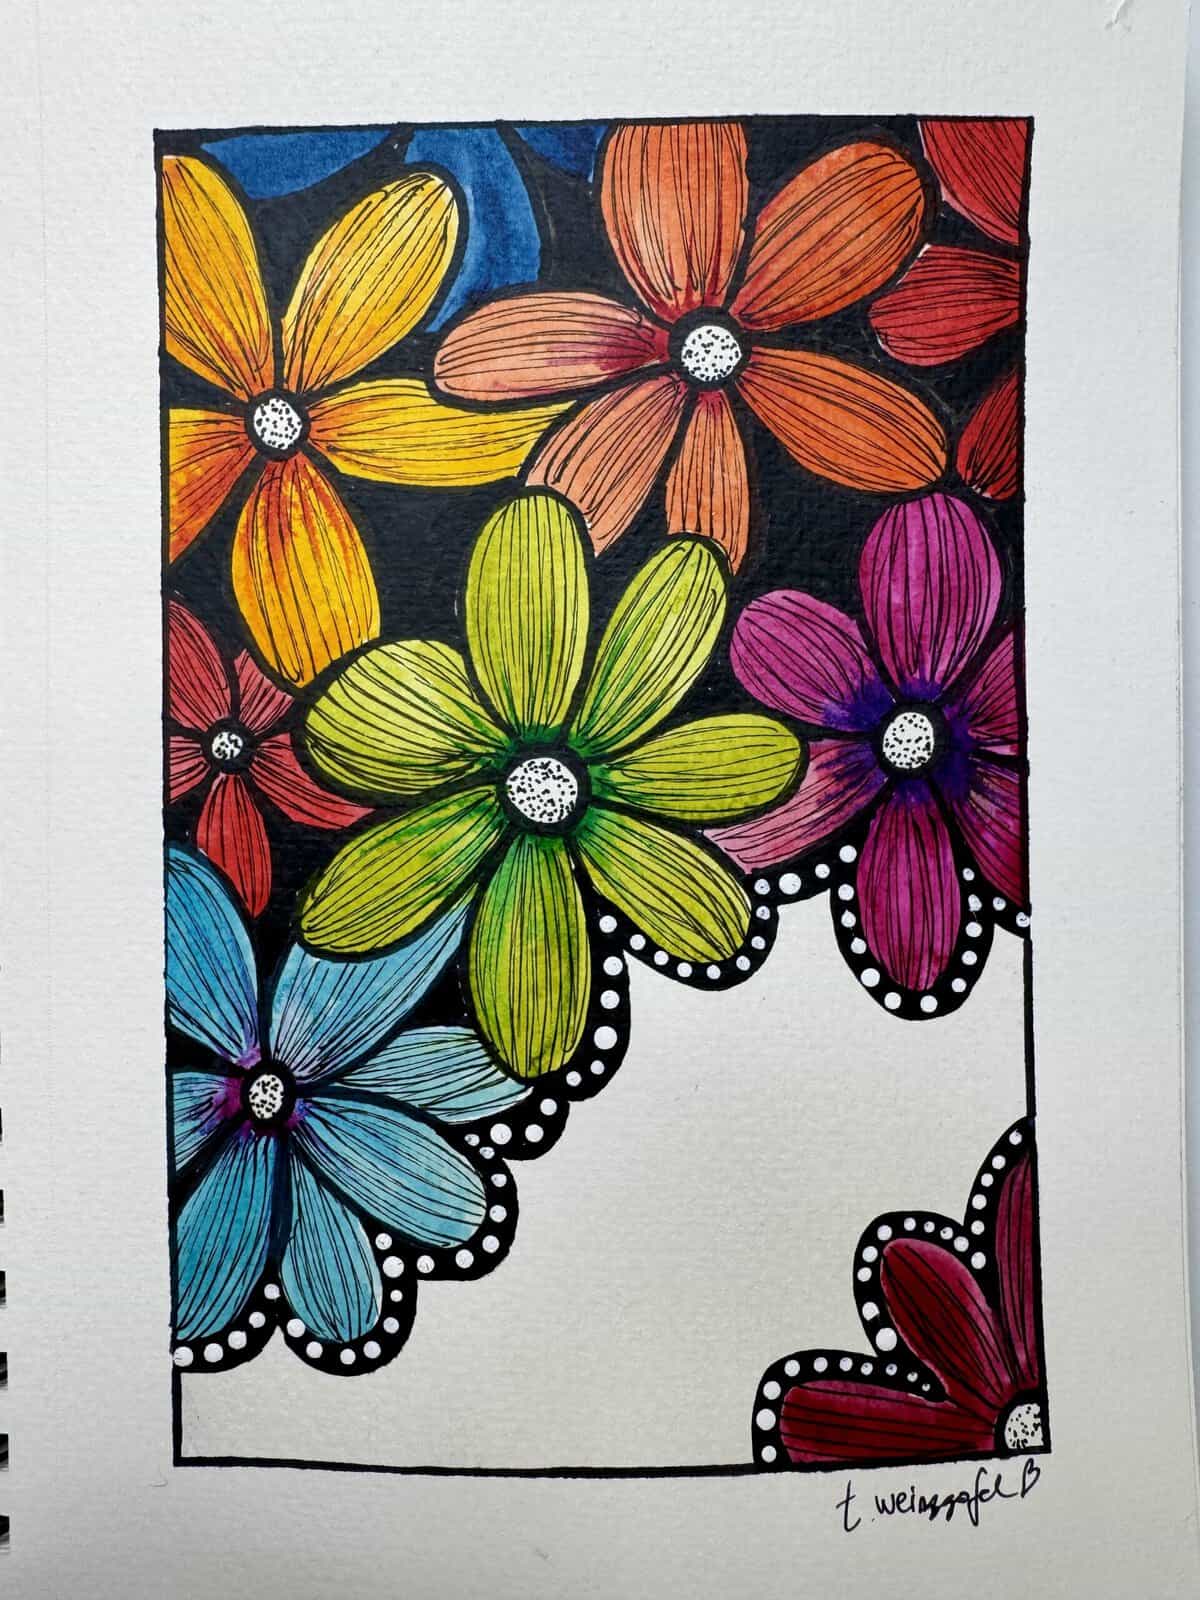
Sometimes you just need to play with color! And this week’s art journal project is ALL about bright, happy flowers, bold black outlines, and a little creative experimenting.
I started with a simple idea: What if I painted the same flower over and over, filling my page with colorful blooms? I didn’t have the entire project planned out, but I knew I wanted to use my watercolors, add some pen details, and try something a little different. The result is a cheerful floral art journal page filled with vibrant yellows, oranges, greens, blues, pinks, and purples. The bold black background really makes those colors pop, while the white space and playful dotted border give the whole piece a fun, whimsical feel.
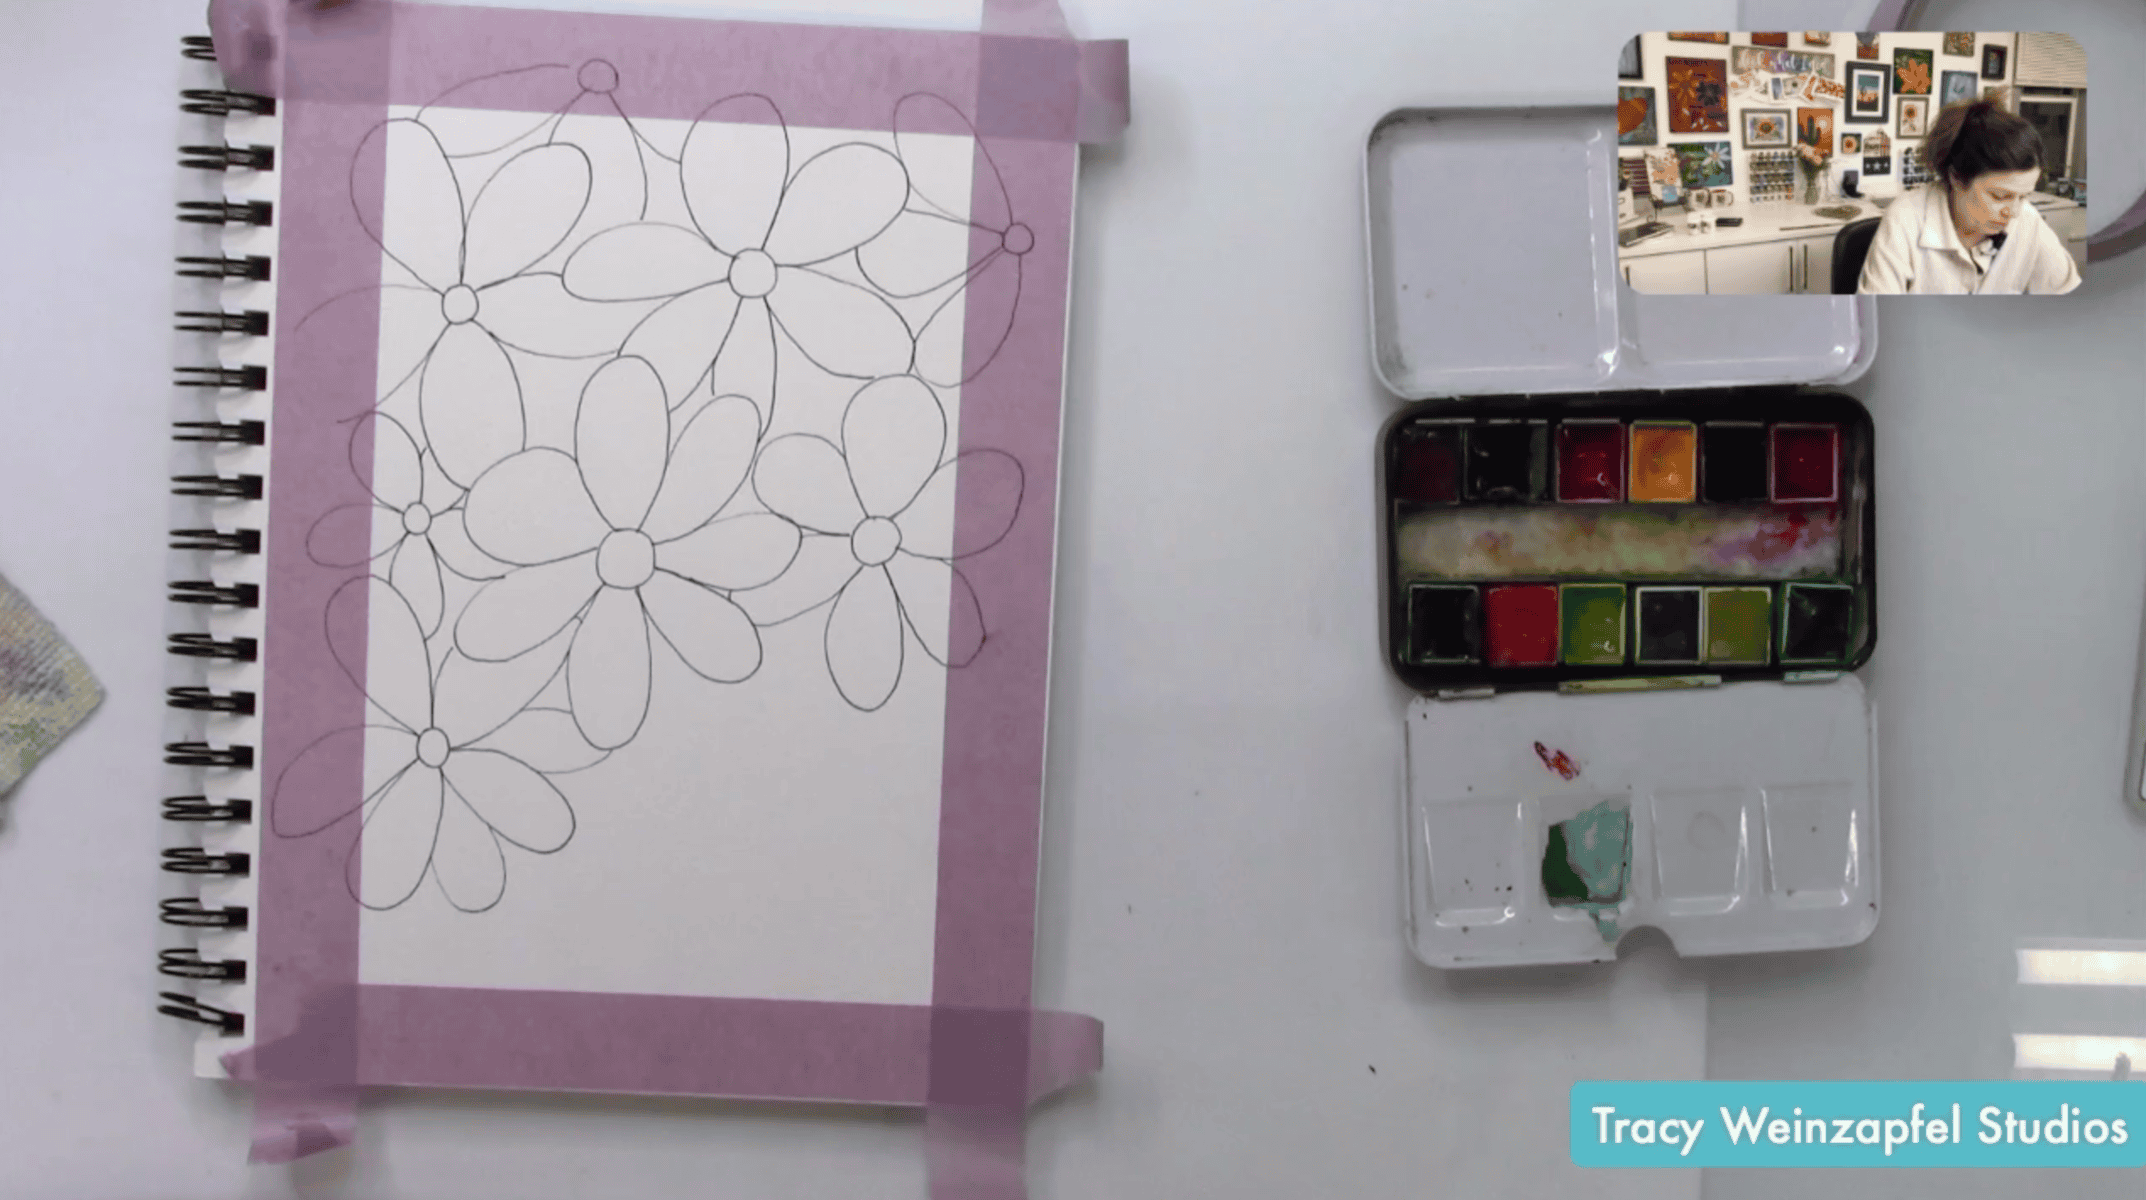
Prep your art journal page by taping off the edges with painter’s tape. Mist your watercolor palette with water to activate the colors.
Start by drawing a simple flower directly onto your art journal page using a black Micron pen. I decided to skip the pencil entirely and go straight in with ink! Keep your flower shape simple, with a small circular center and several long, rounded petals extending outward. Don’t worry about making each petal identical because a little variation gives your flowers personality. I started with a fairly large flower near the upper portion of my page, knowing I wanted to create a bold floral design that would eventually become a colorful border around an open area.
Now comes the fun part! Continue drawing the same basic flower shape in different sizes, allowing the blooms to overlap and extend beyond the edges of your painting area. I worked my way around the page, adding flowers to the top, sides, and bottom corners while intentionally leaving an open space toward the lower center. Some flowers are large, some are smaller, and several are only partially visible, which creates a playful composition full of movement. Repeating one simple shape can create a really interesting design!
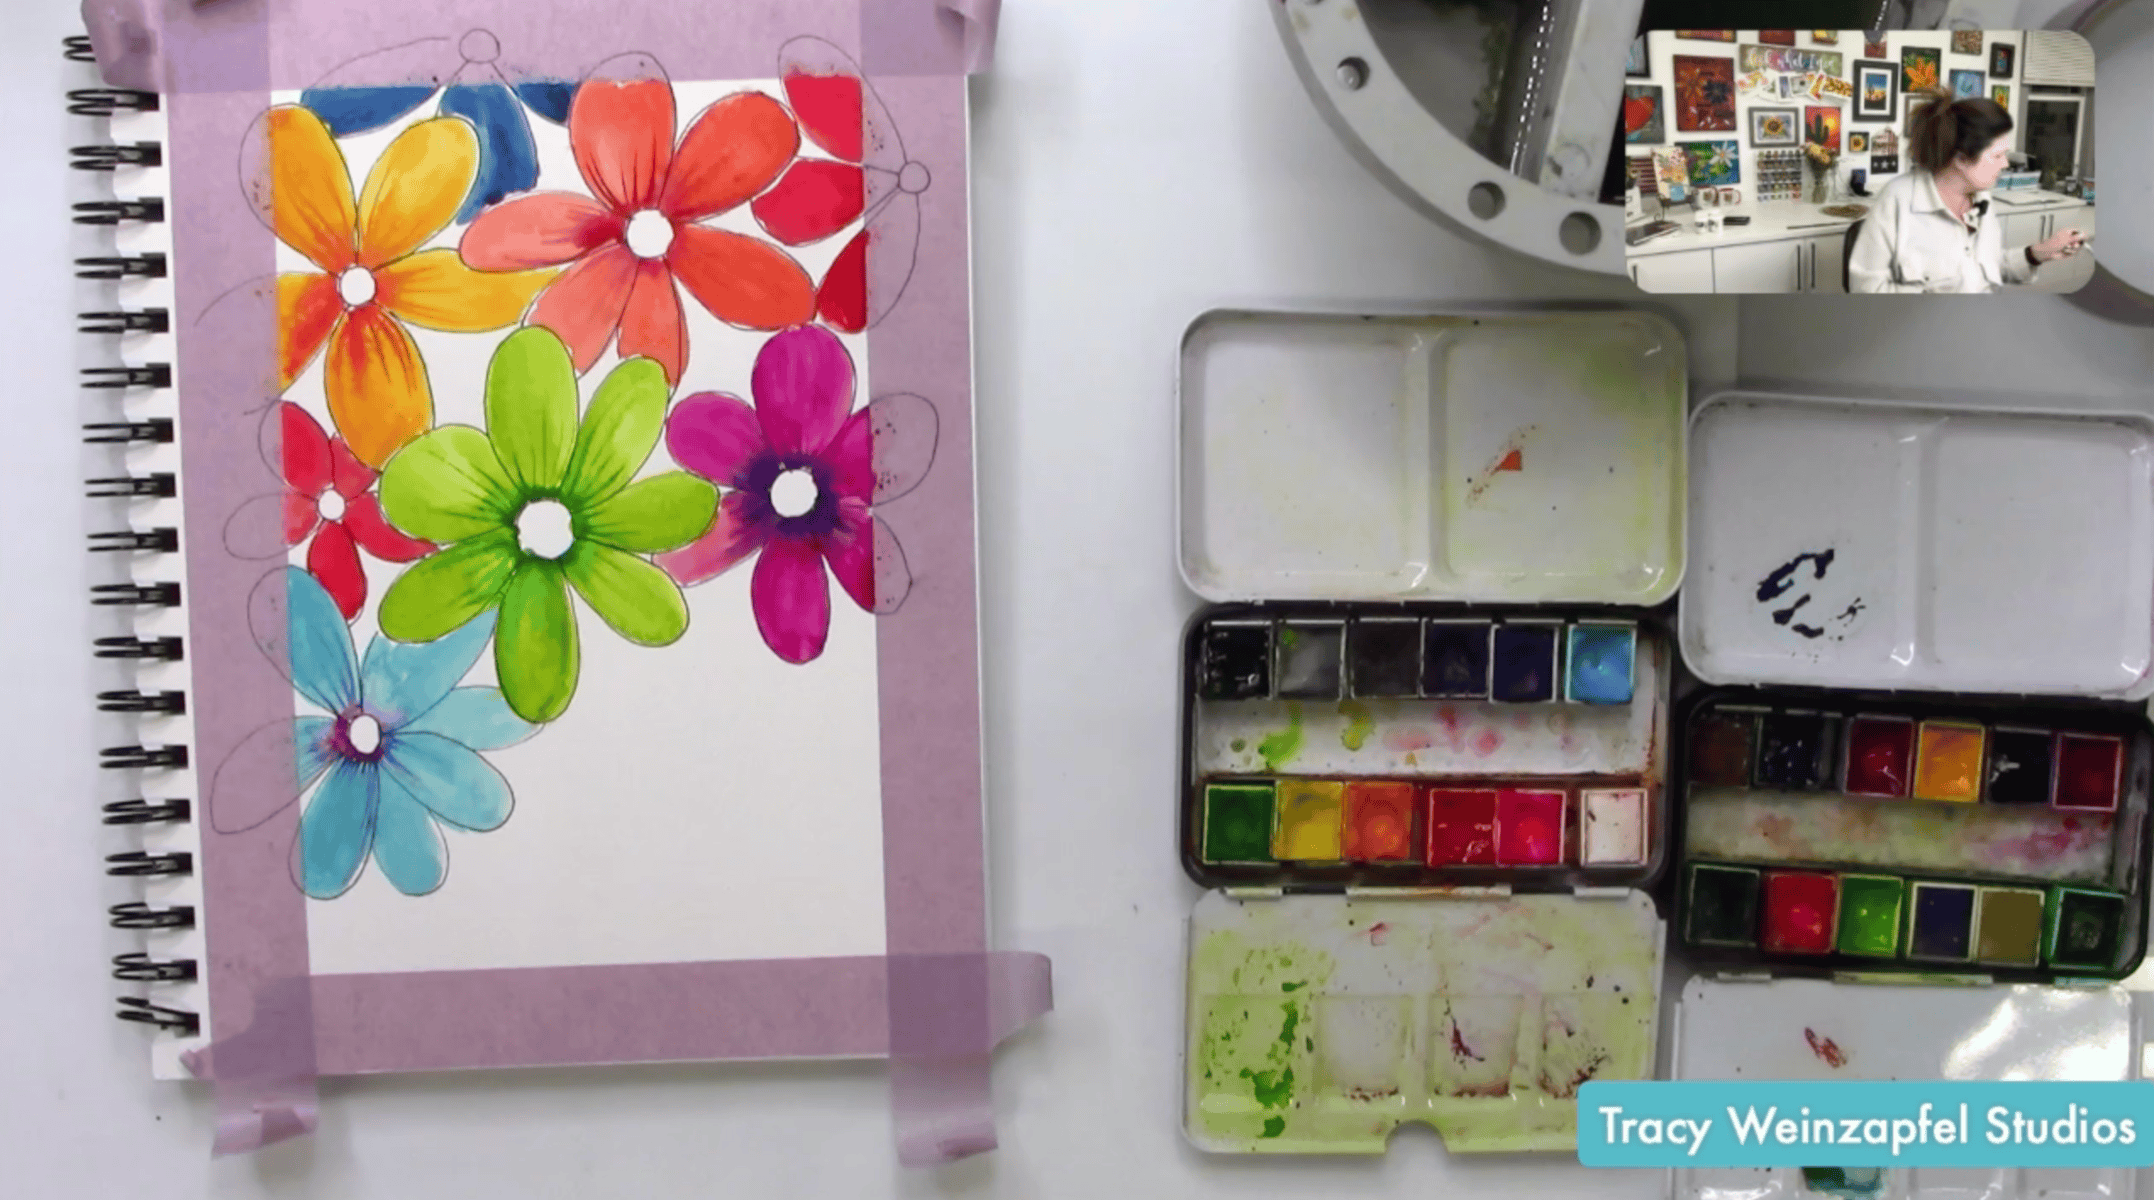
Once your flowers are drawn, it’s time for COLOR! I started with my Tropical watercolor set and began filling the petals with bright, cheerful colors. I used yellows, oranges, greens, pinks, and purples, letting the watercolor move naturally across the paper. As I painted, I realized I wanted even more color options, so I pulled out my Classic watercolor set for some additional reds, blues, and teal.
Try using more than one color within a flower. You might add a little orange to yellow petals or blend purple into pink. I also left the flower centers white, which creates a nice contrast against all those vibrant petals. Because the flowers touch and overlap, be mindful of which areas are still wet. You can move to another flower while the first one dries to avoid accidentally blending colors together.
After laying down the initial watercolor, I went back with a small liner brush and added darker shades to selected petals. This is a simple way to give your flowers more depth without making the painting overly complicated. Use a slightly darker version of the original color near the center of each flower or along the edges of a few petals, allowing some of those colors to blend into the first layer.
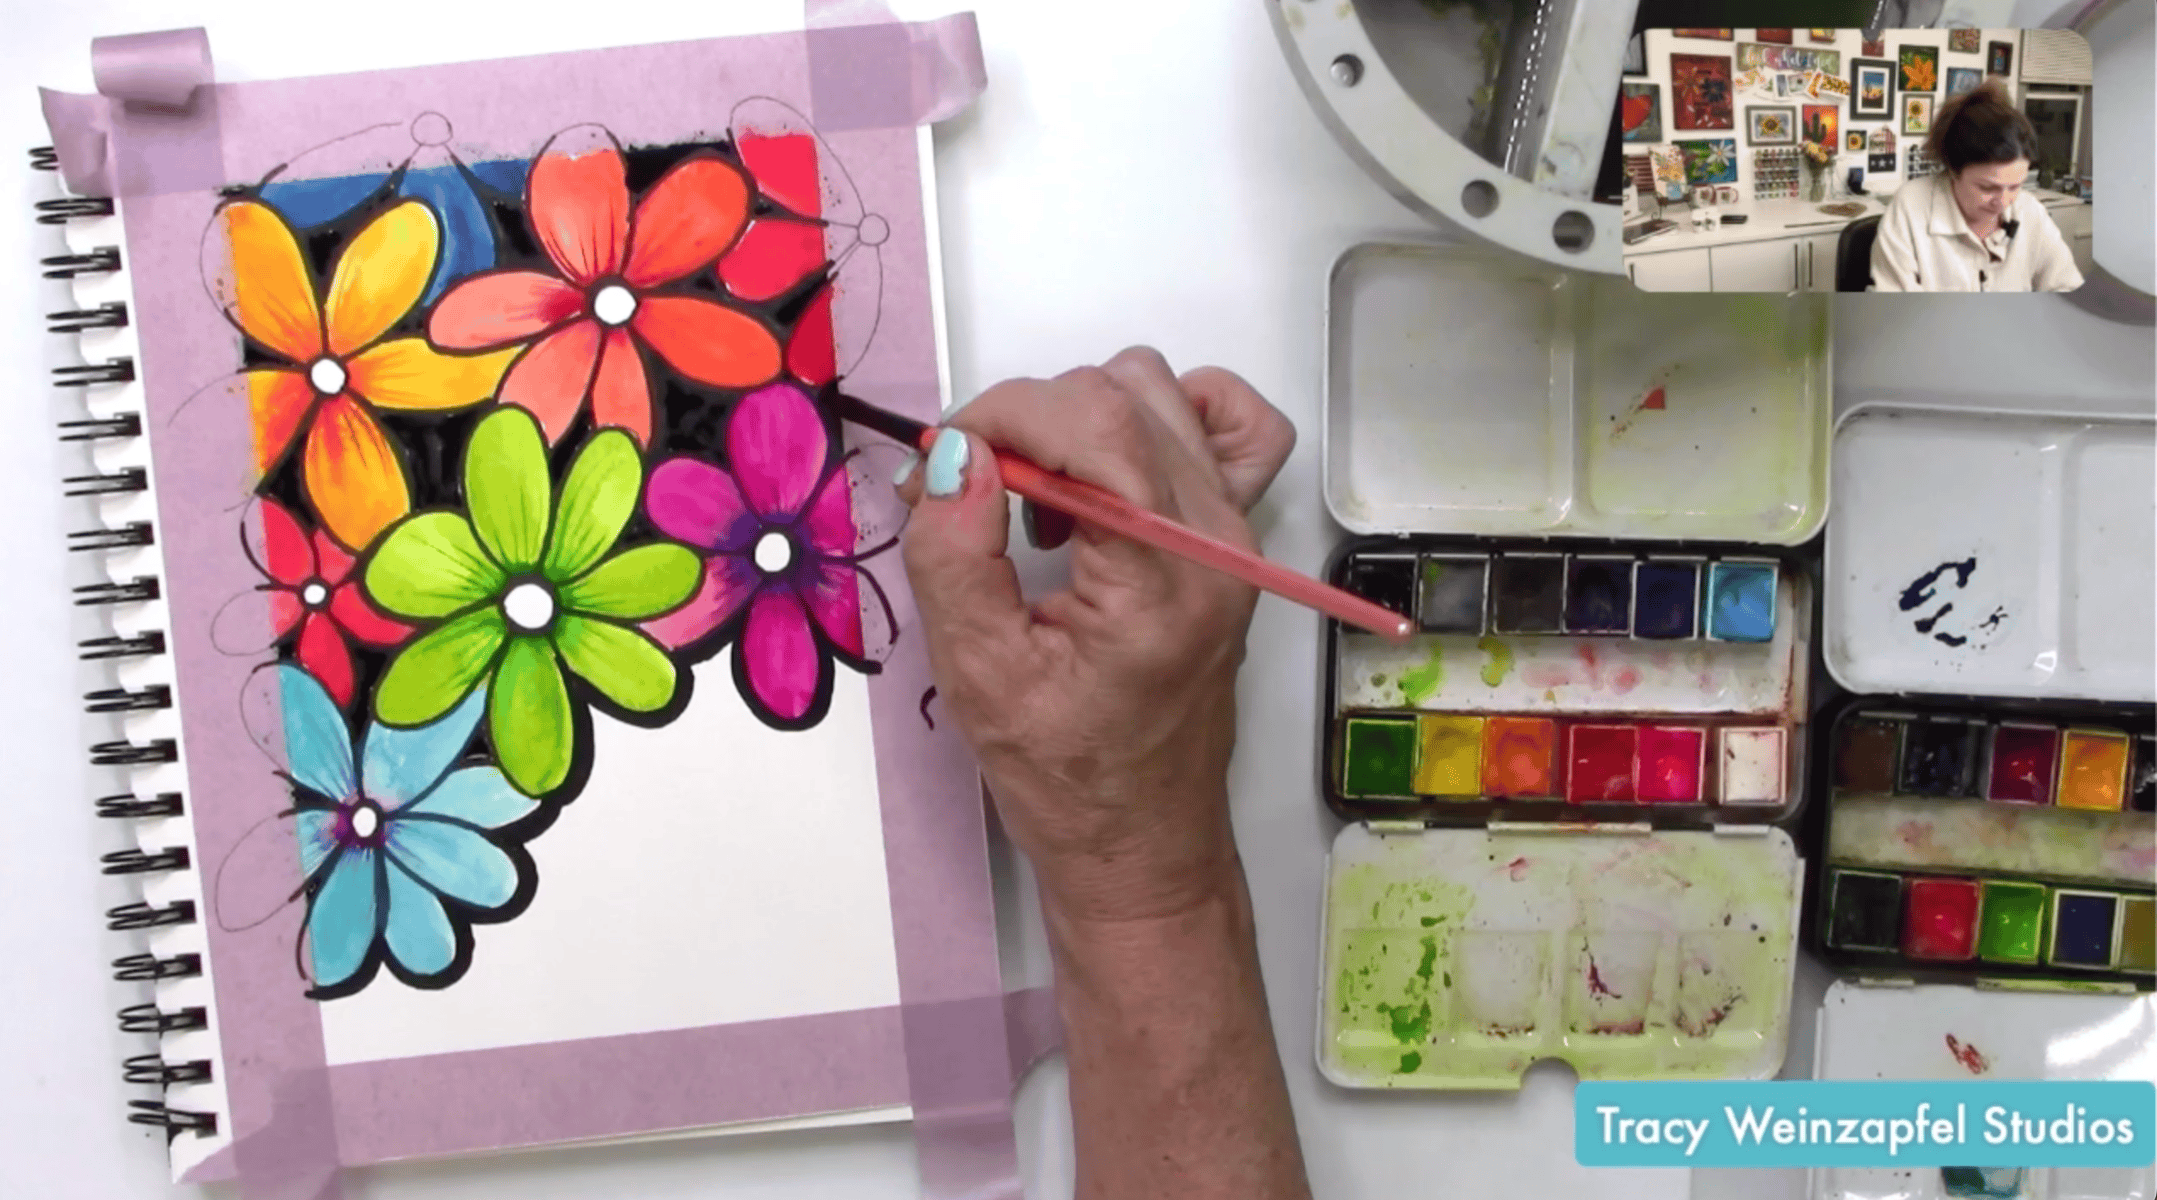
Once your watercolor has dried, it’s time to make those flowers POP! For this project, I wanted something a little different from my usual delicate linework, so I experimented with much thicker black outlines. I used a black Posca paint pen to trace around the flower petals and strengthen the edges of my design. The thick outlines give the flowers a graphic, almost illustrated appearance and help separate the colorful petals from one another.
Here’s where the entire painting starts to transform! Using black watercolor paint and a small brush, carefully fill in the spaces between your flowers. I wanted the background to be bold and dark so that all those bright watercolor colors would really stand out. Work around the edges of each flower, following the outlines you’ve already created. A smaller brush is helpful for getting into those narrow spaces between petals. As the black background develops, you’ll notice how much more vibrant the flowers appear. Try to avoid adding too much water to your paint so you get good coverage while maintaining those crisp, bold shapes.
Now we’re going to add one of my favorite finishing touches: linework! Using a fine-tip Micron pen, draw thin lines from the center of each flower outward toward the tips of the petals. You can follow the natural direction of each petal, allowing the lines to curve slightly as they extend. Some lines can be longer, while others can stop partway through the petal. The goal is to create texture and movement without covering up all that beautiful watercolor. I also added small black dots and details to the white flower centers. These simple marks make the flowers feel more finished and give the painting an extra layer of visual interest.
I added another small flower near the bottom corner to help balance the composition while keeping the central white area open. You could leave this space exactly as it is or use it later for journaling, a favorite quote, or a meaningful message. For my page, I decided to let the white space be part of the artwork.
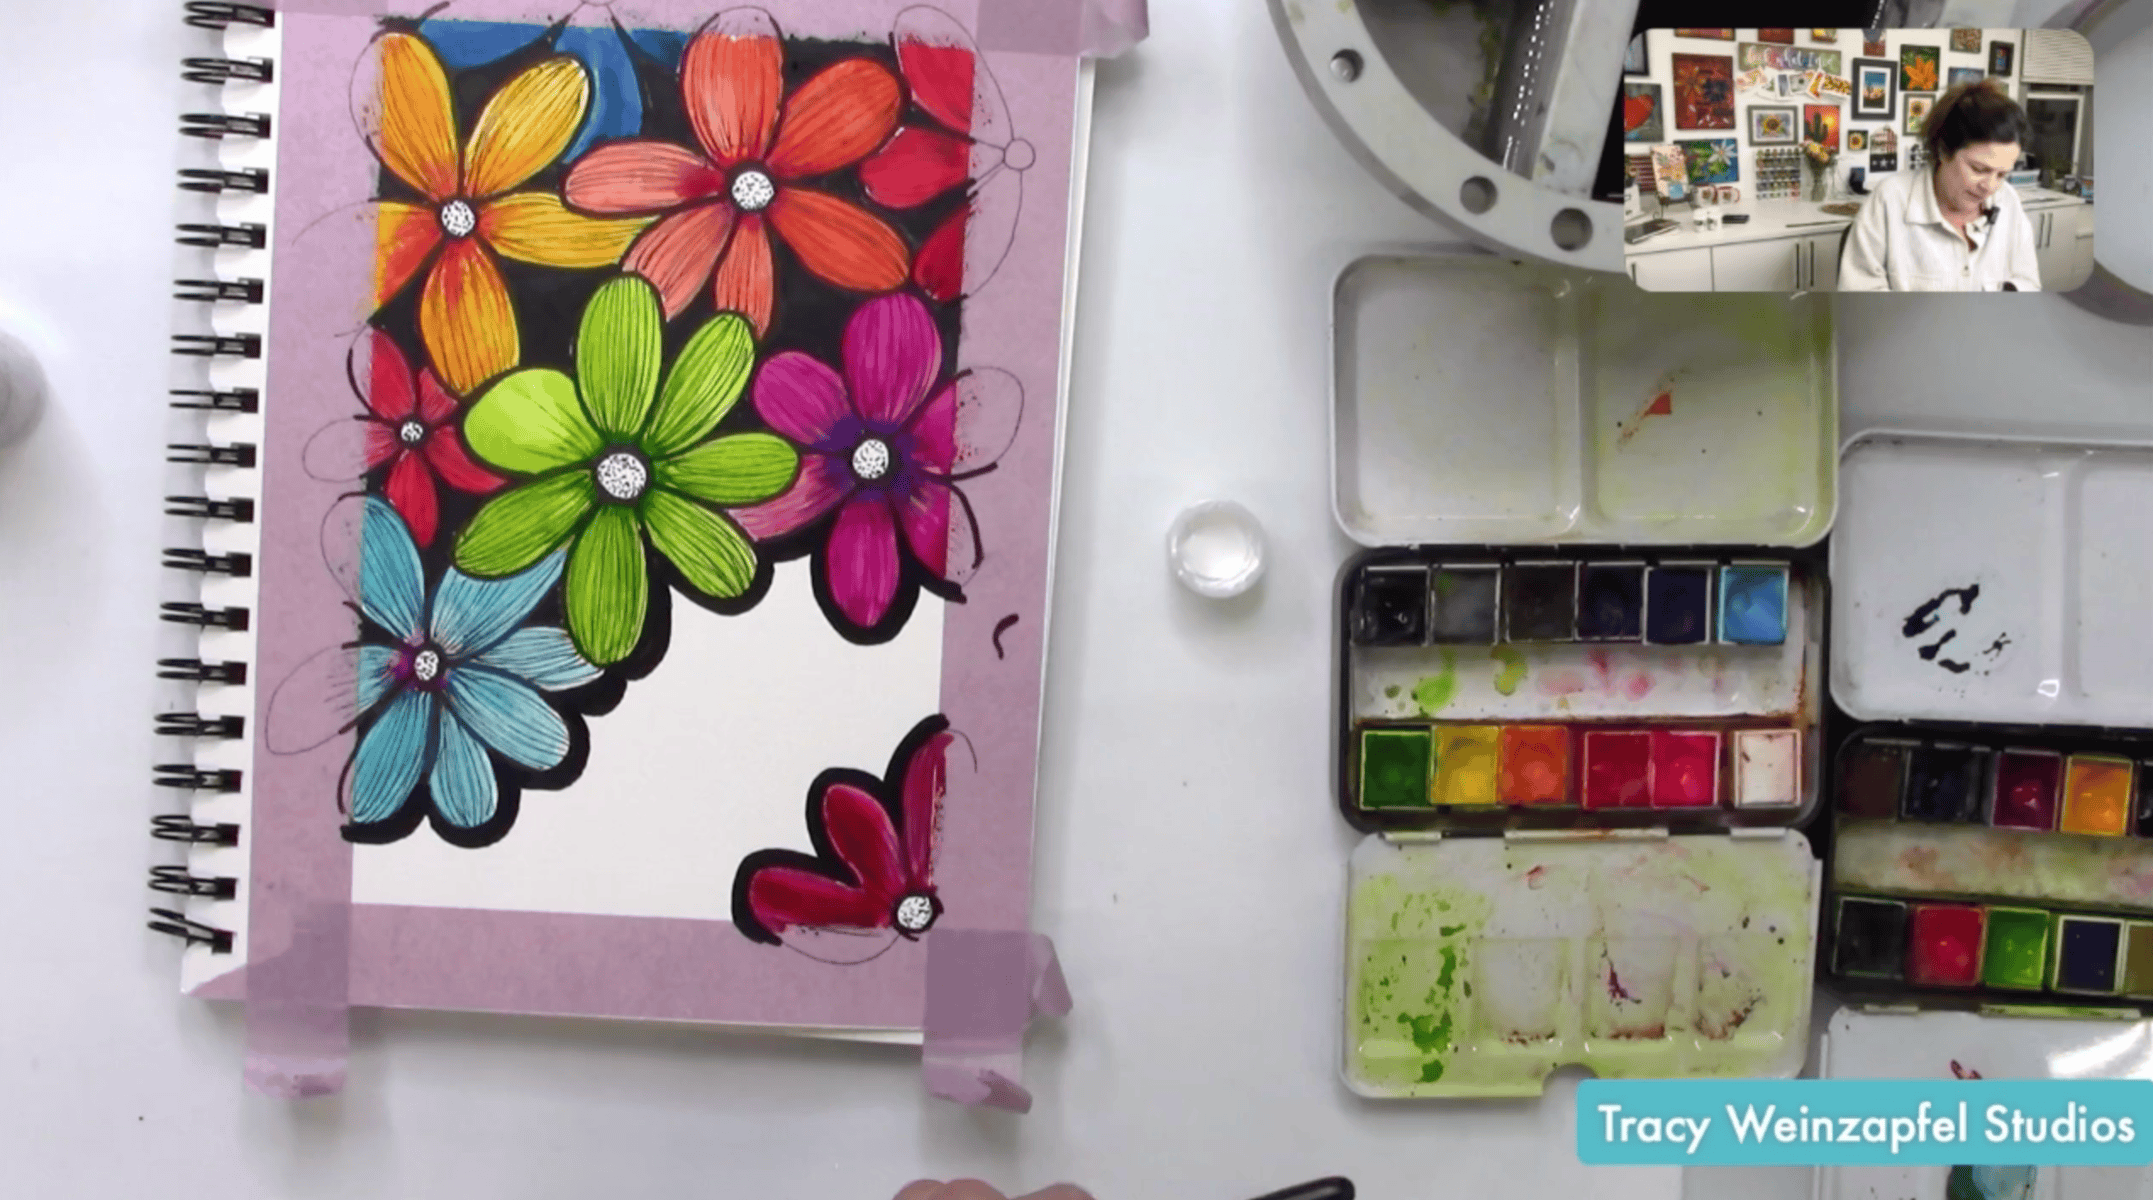
To finish the design, I added a thick black scalloped outline around the edge of the open white space and brought in white acrylic paint dots along that border. Those little dots are such a fun detail! They soften the heavy black outline and add a whimsical touch that ties everything together. I also added a final black line around the outside of the rectangular painting area to give the entire piece a clean, finished appearance. This project has a lot of bold shapes and bright colors, so those small white details create a wonderful balance.
Once all the watercolor, acrylic paint, and pen details are completely dry, it’s time to protect your artwork. For this project, I used Dorland’s Wax Medium rather than a spray fixative. I applied a thin layer gently over the artwork, being careful not to disturb the pen details, and then wiped away the excess with a shop towel. I prefer using wax for certain mixed media projects because alcohol-based markers and some pens can react with aerosol fixatives and cause unwanted bleeding. Make sure everything is dry before sealing, especially the black acrylic background and white paint details.

I have to say, this project turned out SO happy! I started with a simple flower shape, repeated it across the page, and just kept adding color and details until everything came together. I love the contrast between the vibrant watercolor flowers and the bold black background. And that little dotted border around the white space? Such a fun finishing touch!
Make this project your own! Try different flower shapes, switch up the color palette, or fill the white space with a special message. There are so many possibilities. I hope this inspires you to pull out your watercolors, grab a pen, and create something that makes you smile.
Watch the replay below!
Thank you for joining in on the creative fun. Join us LIVE every Wednesday at 5:30 pm PST on Facebook at Tracy Weinzapfel Studios.
Join the waitlist for Your Artful Journey! This is my exclusive creative membership where you can explore the world of art journaling! Join a community of support and inspiration with interactive art sessions full of tips and tricks, conversation, Q & As, and most of all, FUN!
Supply List:
- 7 X 10 Grumbacher Watercolor Journal
- Painter’s tape
- Prima Watercolor Confections — Tropicals and The Classics sets.
- Sakura Pigma Micron pens
- Black POSCA paint marker and black Sharpie.
- Round watercolor brush and fine liner brush — Watercolor – Tracy Weinzapfel Studios, Inc.
- Titanium White acrylic paint
- Dorland’s Wax Medium — optional sealer
Check out Tracy’s Art Journal Starter Kit!
Tracy’s Resources Page and visit Tracy’s Shop