

This floral art journal page is all about relaxing into the watercolor process and letting the painting tell you where it wants to go. Instead of sketching everything first, we begin with a loose wet-on-wet background, allow the colors to blend naturally, and then discover the flowers within those washes. It is colorful, expressive, and intentionally imperfect…the kind of project that reminds you to trust watercolor instead of trying to control every drop.

Begin by taping around the edges of your watercolor art journal page with painter’s tape. This helps keep the watercolor from sneaking underneath and gives you a beautiful, clean border at the end.
Spray or wet your watercolor paints thoroughly before beginning. Giving the pigments a moment to activate makes it easier to pick up rich color and allows the paint to move more freely once it hits the wet paper.
Using a large round brush, apply a thin, even layer of clean water across the taped area. The goal is for the paper to be damp and shiny without having large puddles sitting on top. This wet surface will allow the colors to blend and flow together naturally.
Begin adding bright watercolor directly into the wet paper. Let pinks and reds move through the upper areas, then introduce yellow and green in other sections. Add black near the flower centers. Allow the paint to travel wherever the water carries it.
Do not worry if one color moves somewhere you did not expect. That unpredictability is part of the beauty of wet-on-wet watercolor. If a color begins flowing farther than you want, dry your brush on a paper towel and use the clean, thirsty brush to gently pull the paint back. You can also lift excess water from areas that have become too saturated. This gives you just enough control while still allowing the watercolor to do most of the work.
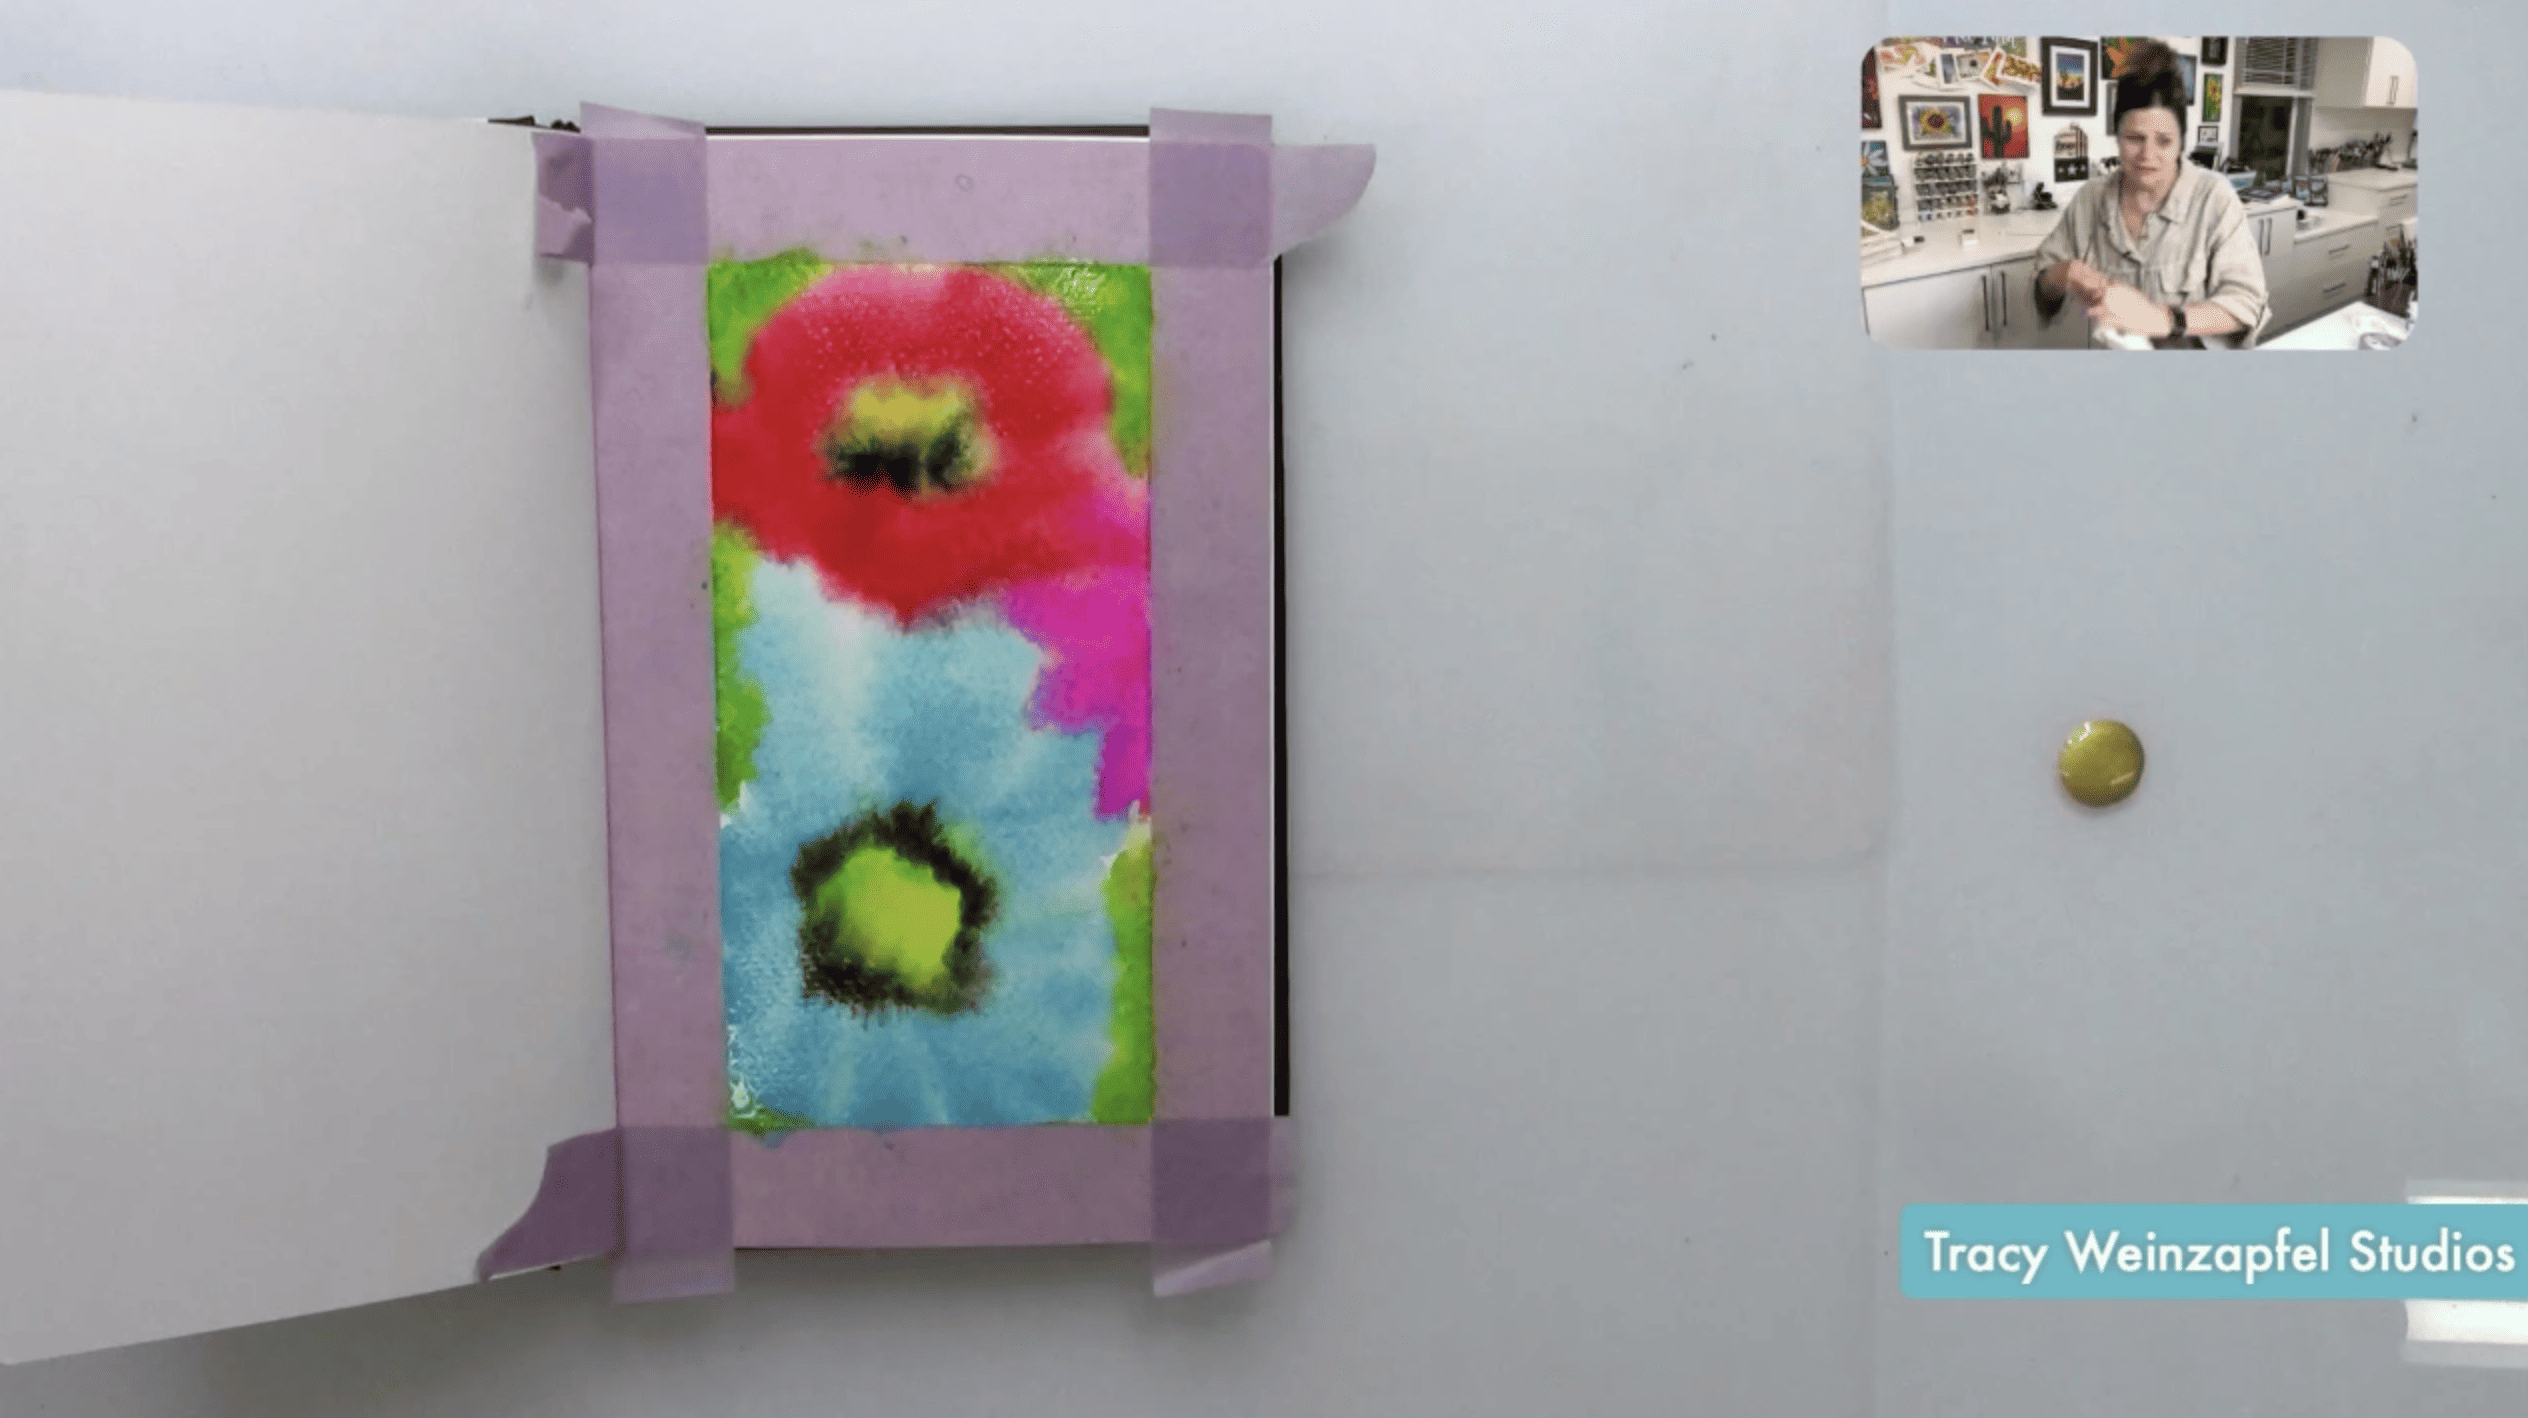
While the watercolor is still slightly damp, load a brush with 24K Gold Extreme Sheen acrylic paint and lightly splatter it over the page. Because the paper is damp, some of the acrylic droplets will spread slightly while others remain more defined.
Keep the splatter loose and spontaneous. A few metallic accents are enough to add beautiful shimmer throughout the finished piece.
Ideally, allow the watercolor to air dry so the pigments can settle naturally. If you are impatient, you can use a heat tool to speed things up. Keep it moving over the surface and be careful not to overheat one area. Make sure the page is completely dry before adding the black linework.
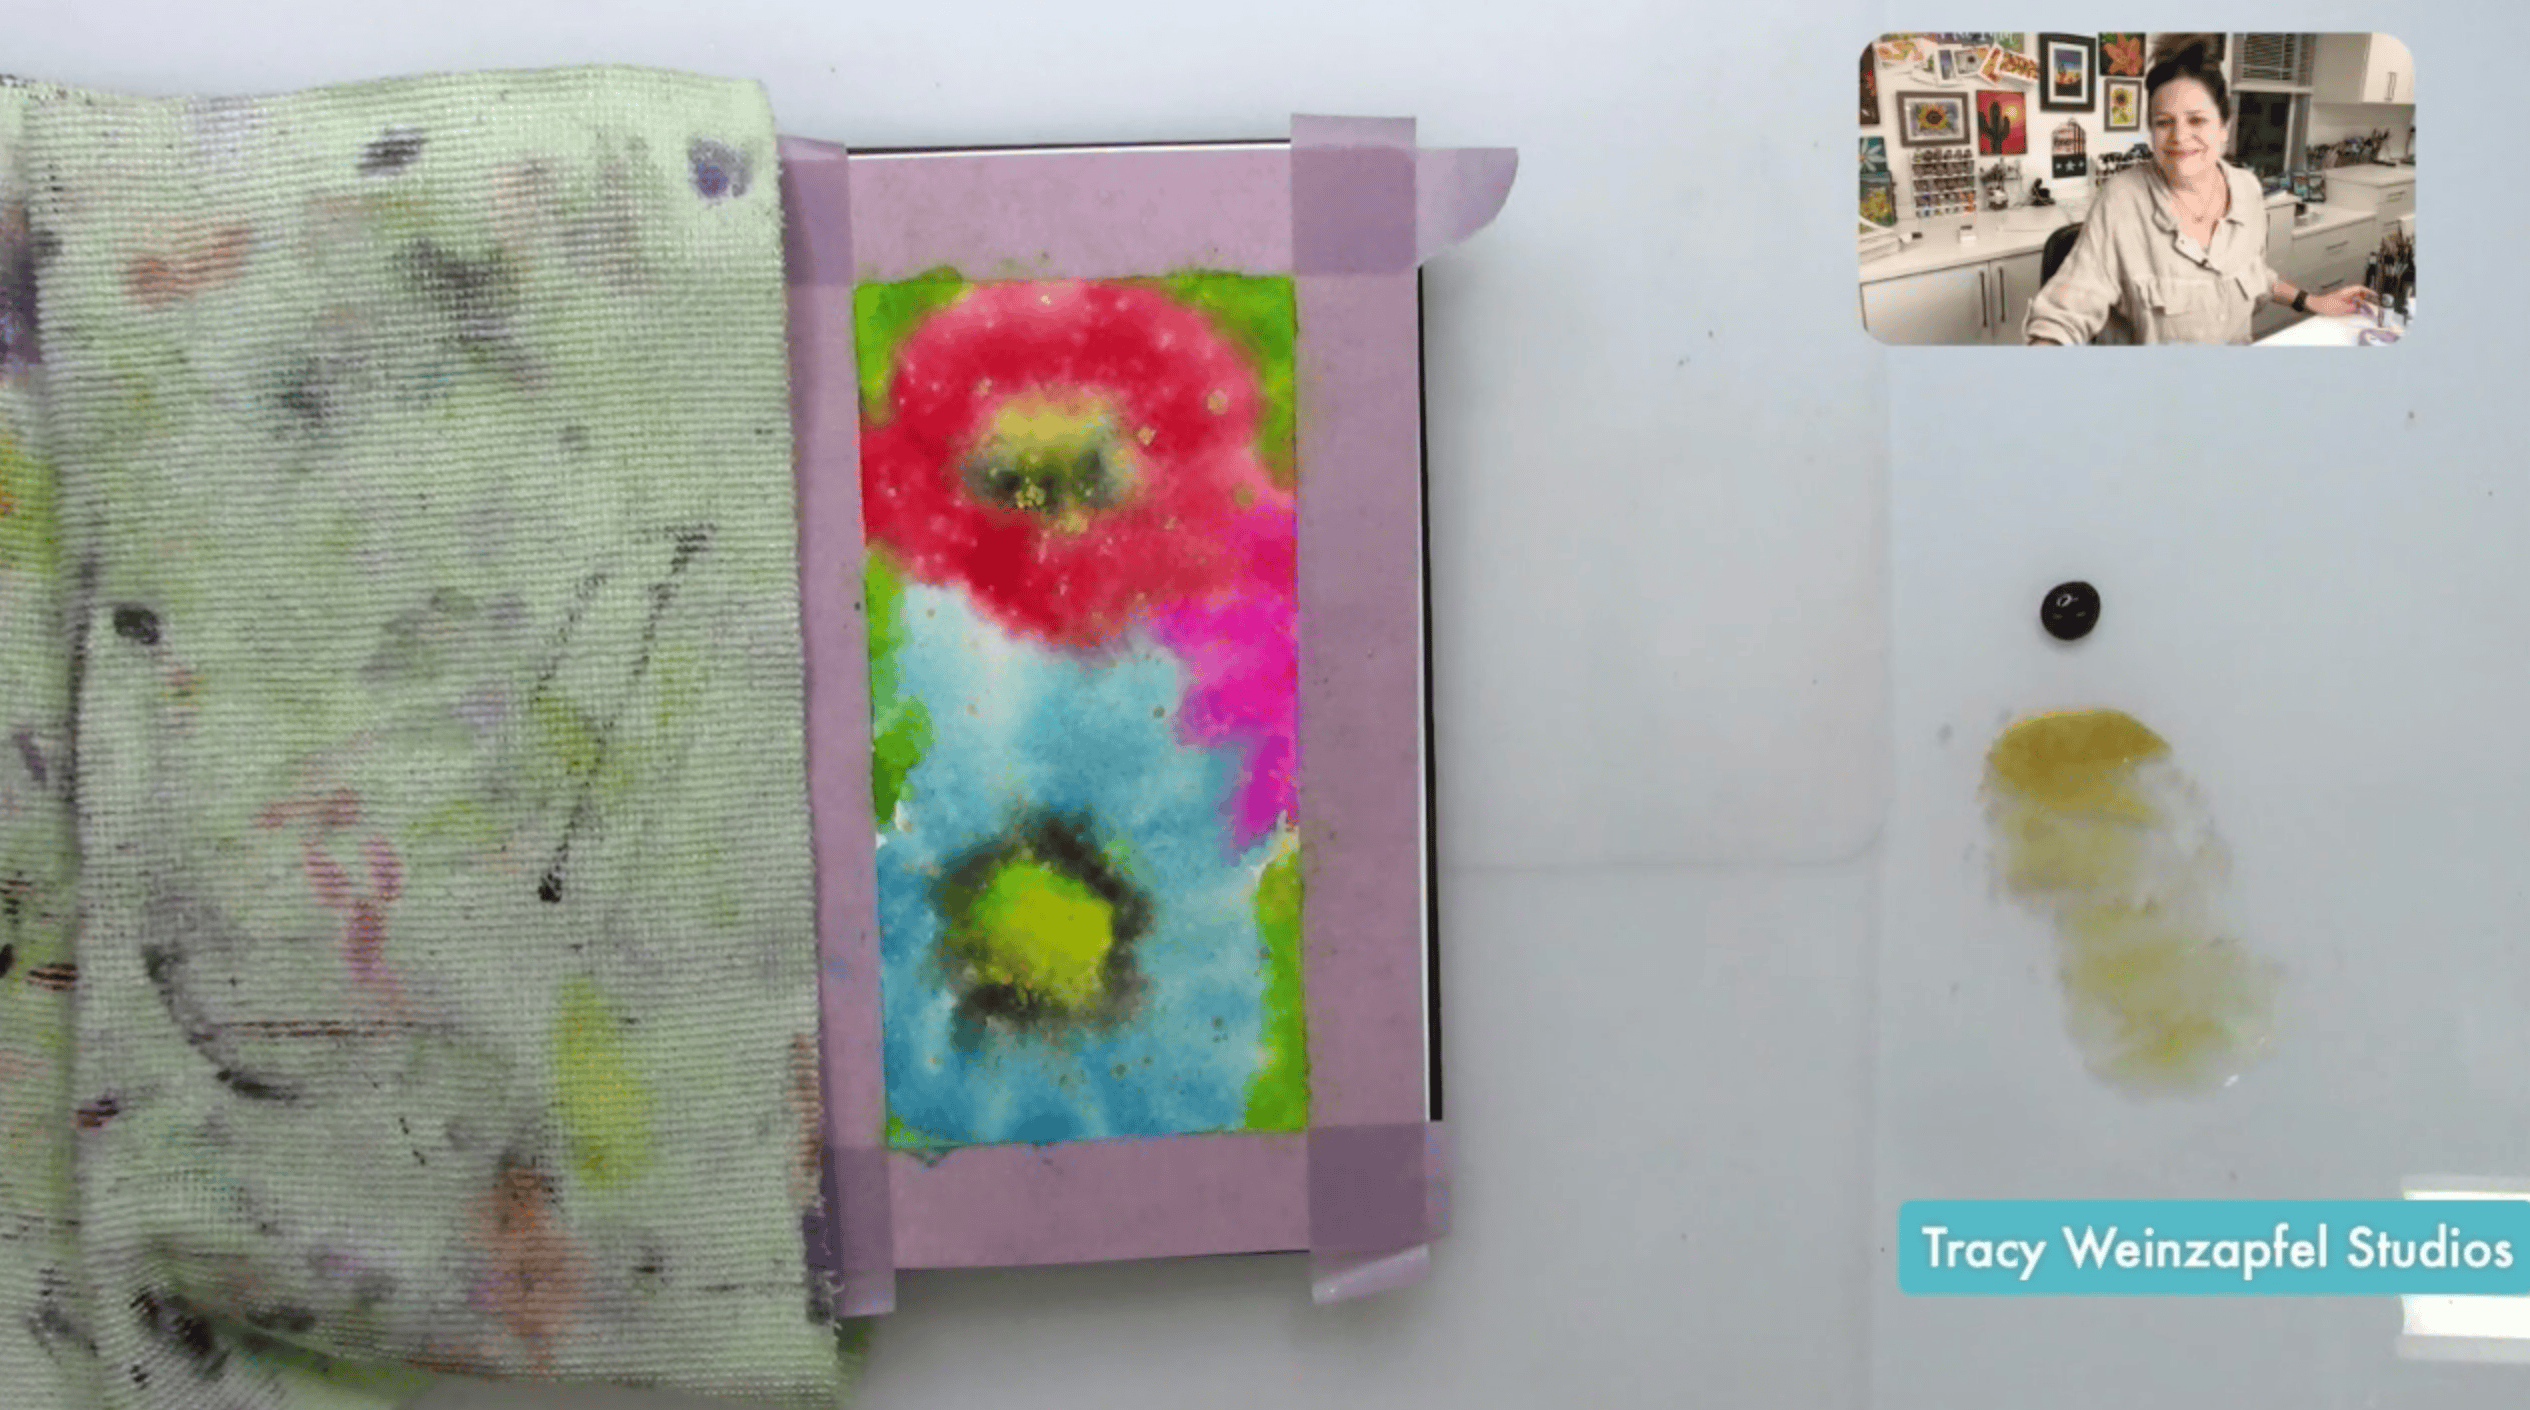
Now look at the dried watercolor and let the shapes guide your composition. Using black acrylic paint and a liner brush, begin loosely outlining the flowers you see within the colorful washes.
In this piece, a large flower takes shape near the bottom, another fills the upper portion, and smaller floral elements peek in from the sides. You do not need to perfectly follow the watercolor edges. Let the painted shapes inspire your lines rather than dictate them.
Continue using the liner brush to add long, loose marks around the flower centers and through the petals. Scribble, sketch, and allow some lines to overlap.
Use a small stencil brush with black acrylic paint to add texture around the centers of the flowers. Load the brush with paint, then pounce most of it off before touching the artwork. A nearly dry stencil brush gives you much more control and creates soft, textured marks instead of heavy blobs.
Use the 24K Gold Extreme Sheen paint again to highlight portions of the flower centers. You can also scatter tiny touches of gold over selected petals to connect the centers with the earlier splatter.
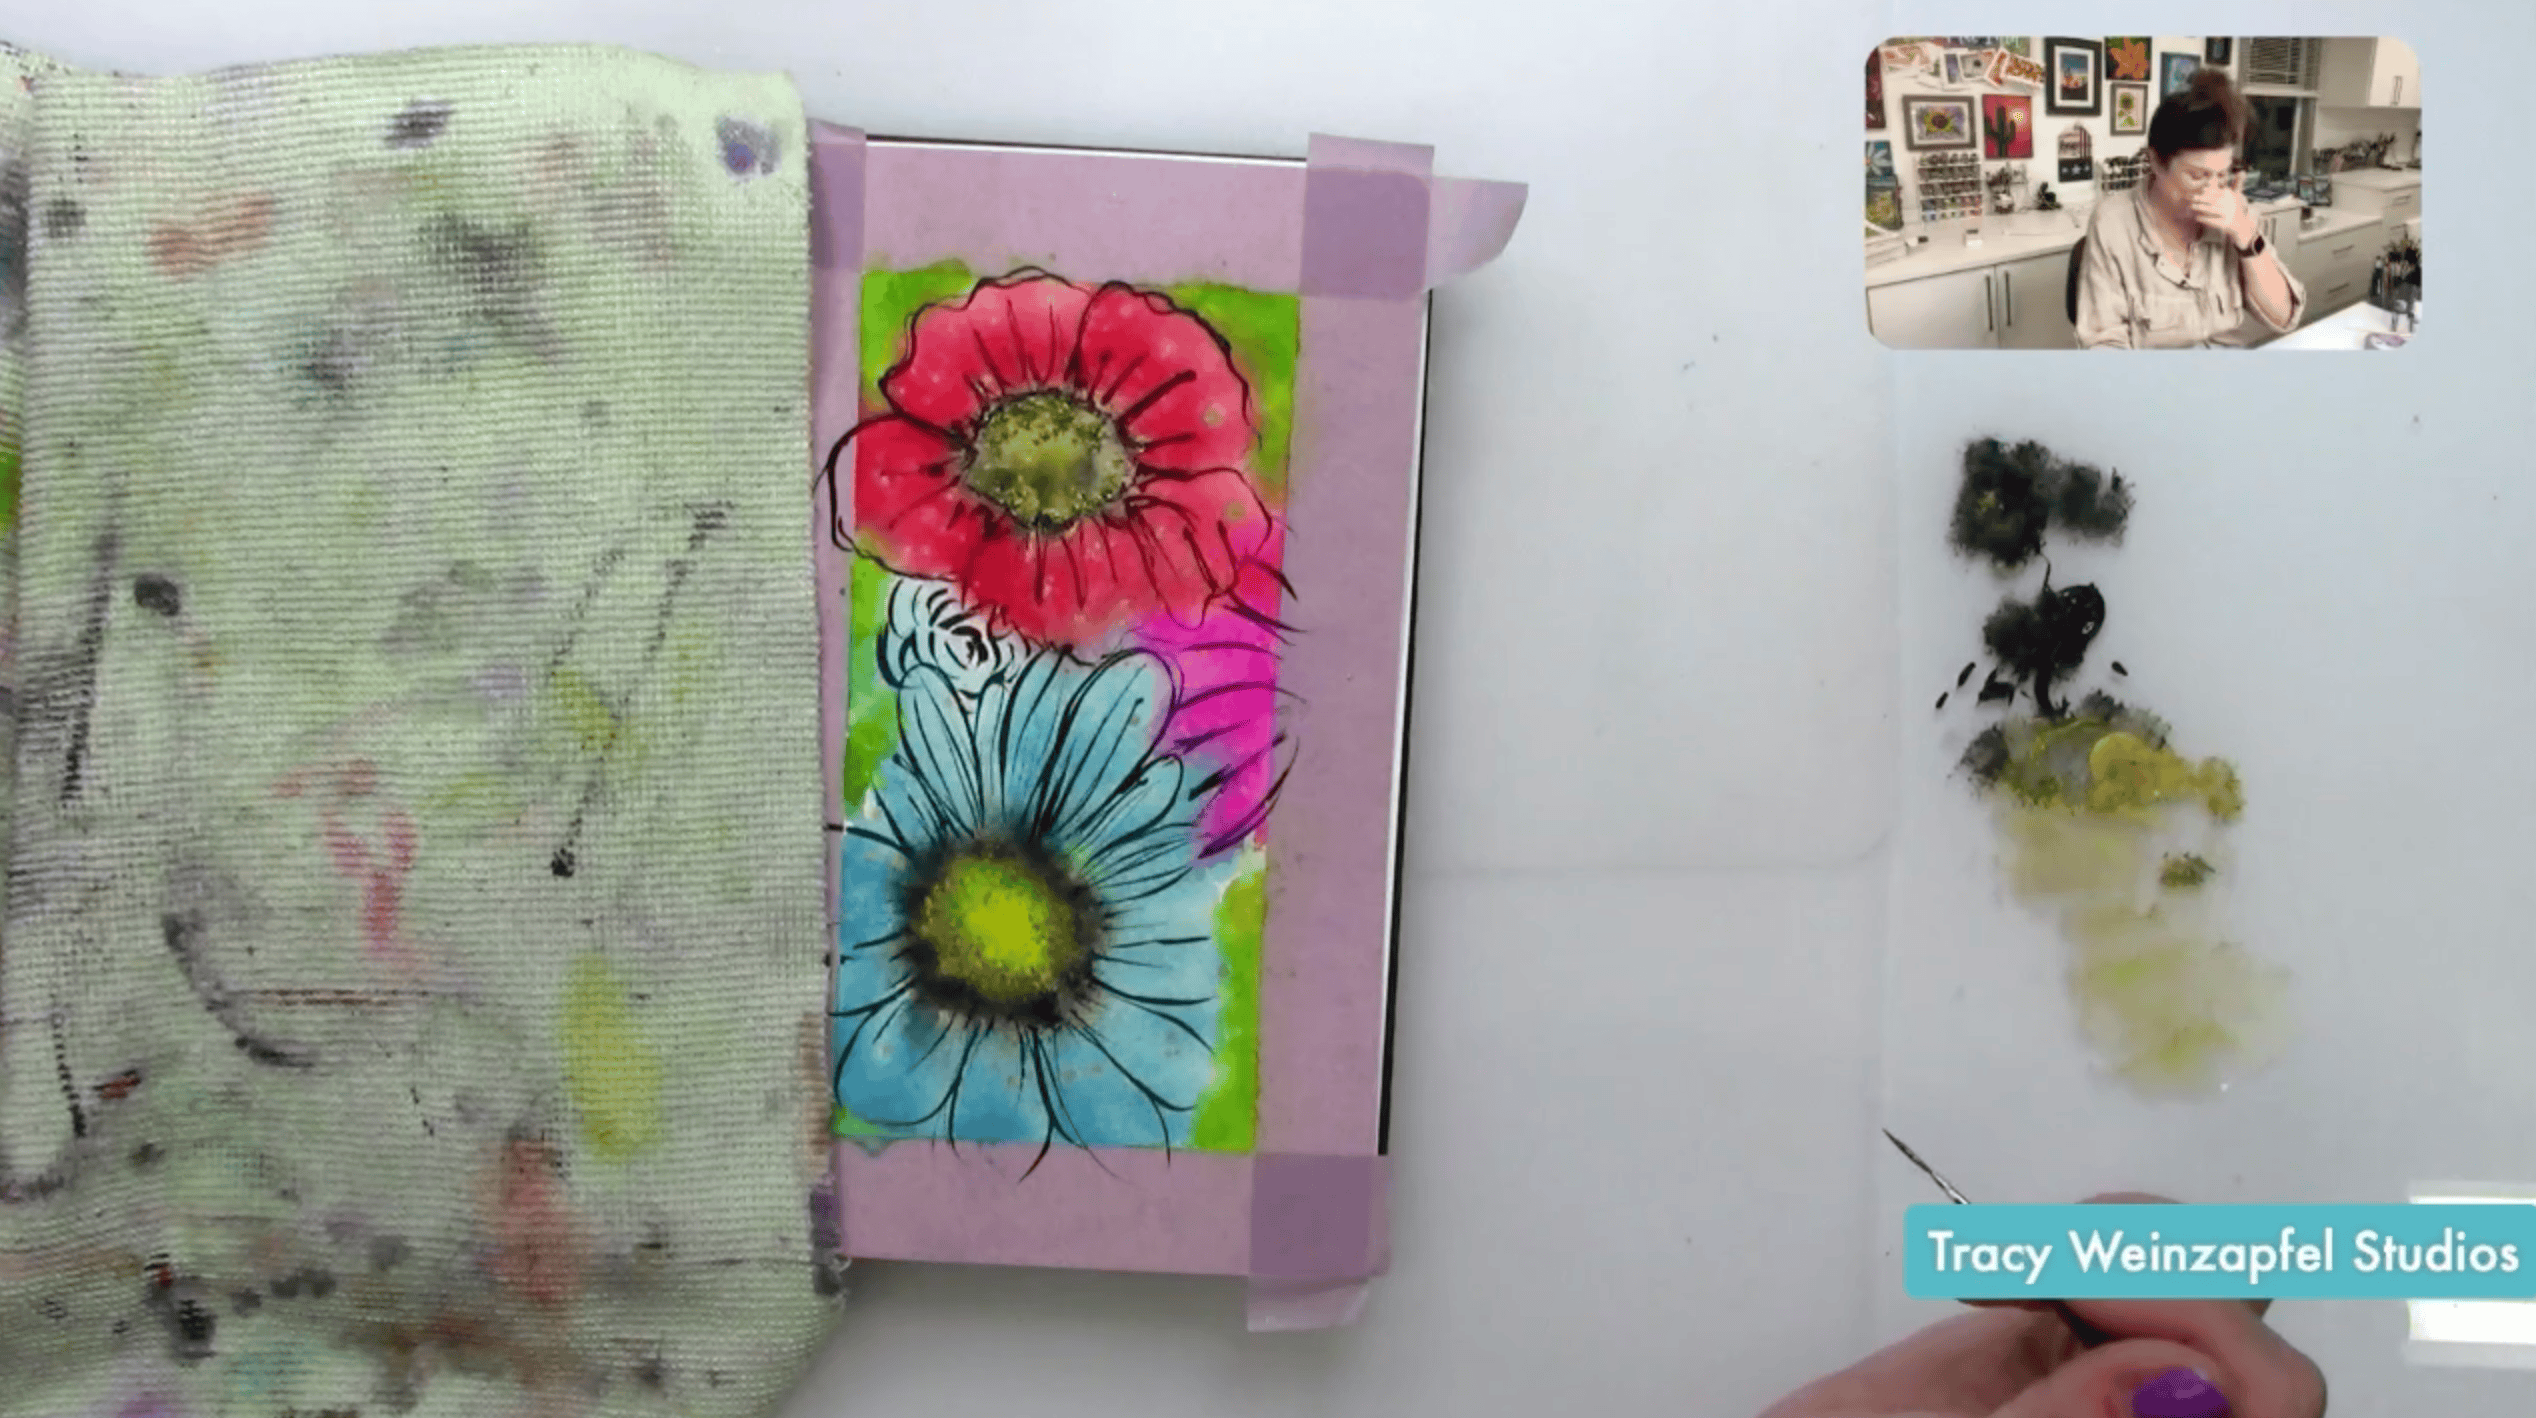
Use the liner brush and black acrylic paint to add simple leaves and stems in the open spaces around the flowers. These darker elements help connect the separate flowers and fill the composition without overwhelming it.
Mix or select a deeper green watercolor and glaze it into portions of the foliage and background. This additional green creates richer contrast and helps separate the flowers from the surrounding leaves.
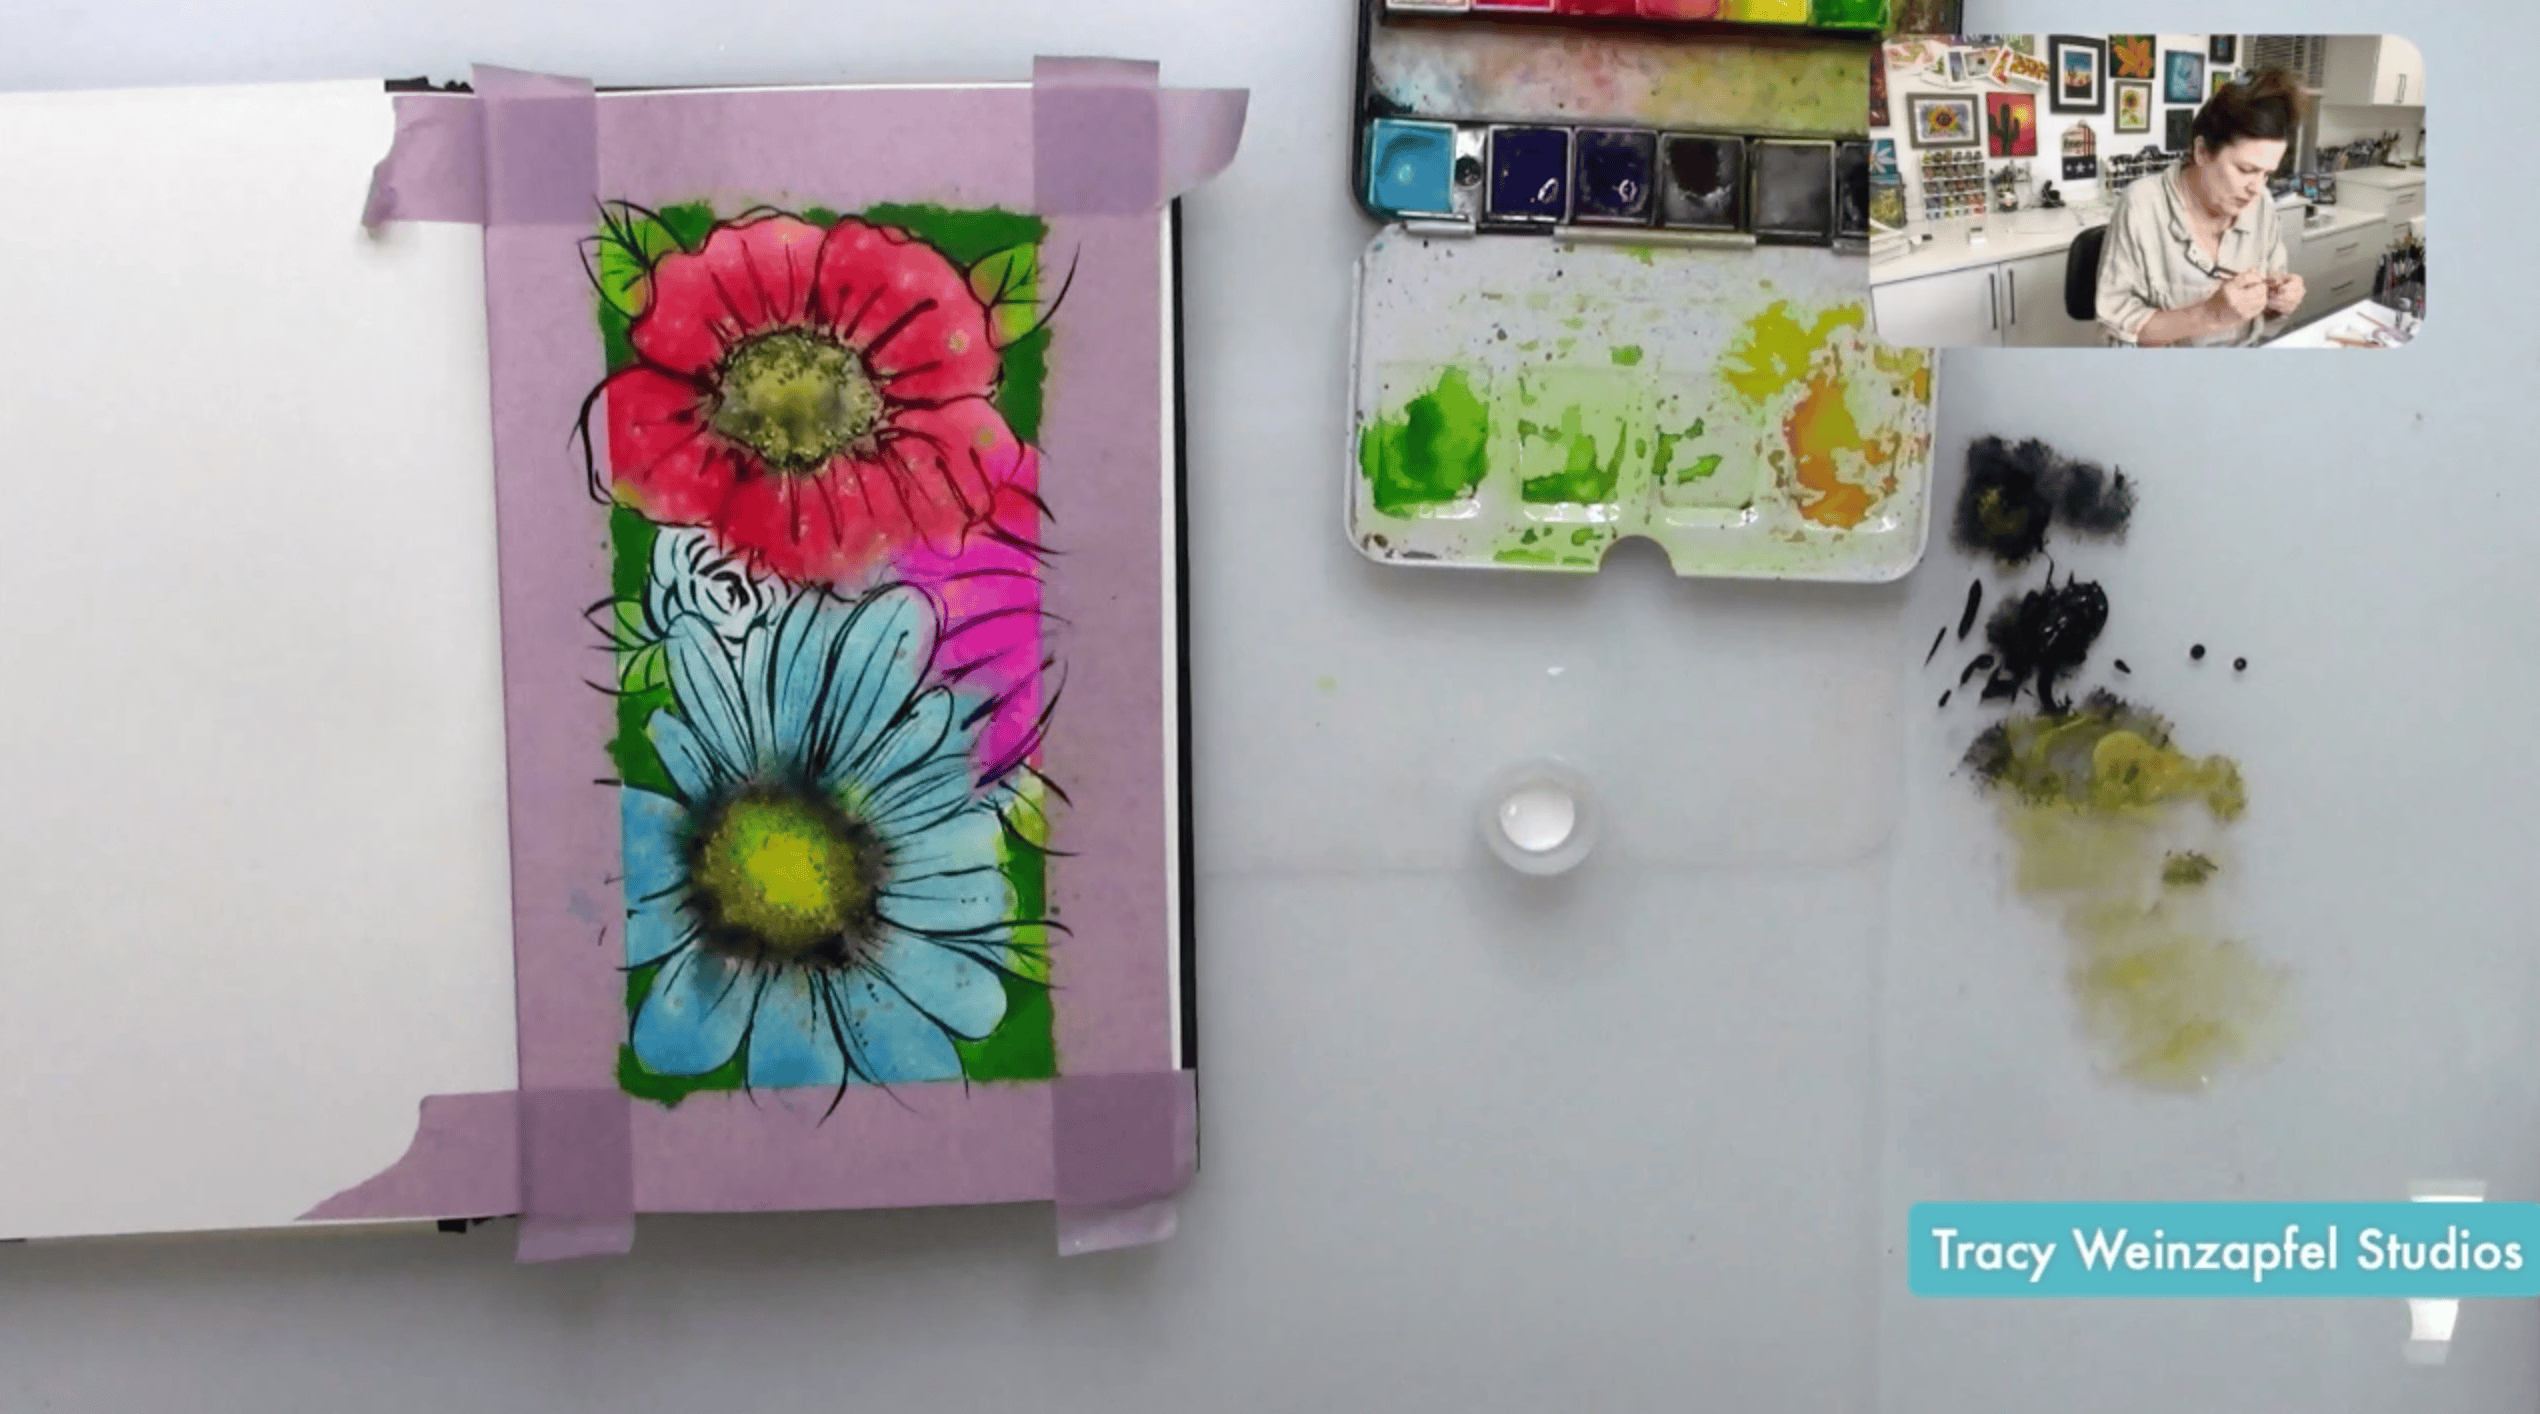
Once everything is dry, use white acrylic paint and a fine liner brush to add small highlights. Place a few thin white strokes along selected petals and floral details.
Do not outline everything. These little white accents work best when they appear only in a few areas and give the page an extra pop of brightness.
Make sure the artwork is completely dry and has cooled down if you used a heat tool. Apply a small amount of Dorland’s Wax Medium with a soft cloth or paper towel and gently rub it over the painted area. This seals the water-soluble layers without brushing over them and reactivating the watercolor.
Carefully peel away the painter’s tape to reveal the crisp white border. Pull the tape slowly and away from the artwork to reduce the chance of tearing the paper. Finish by signing your page.
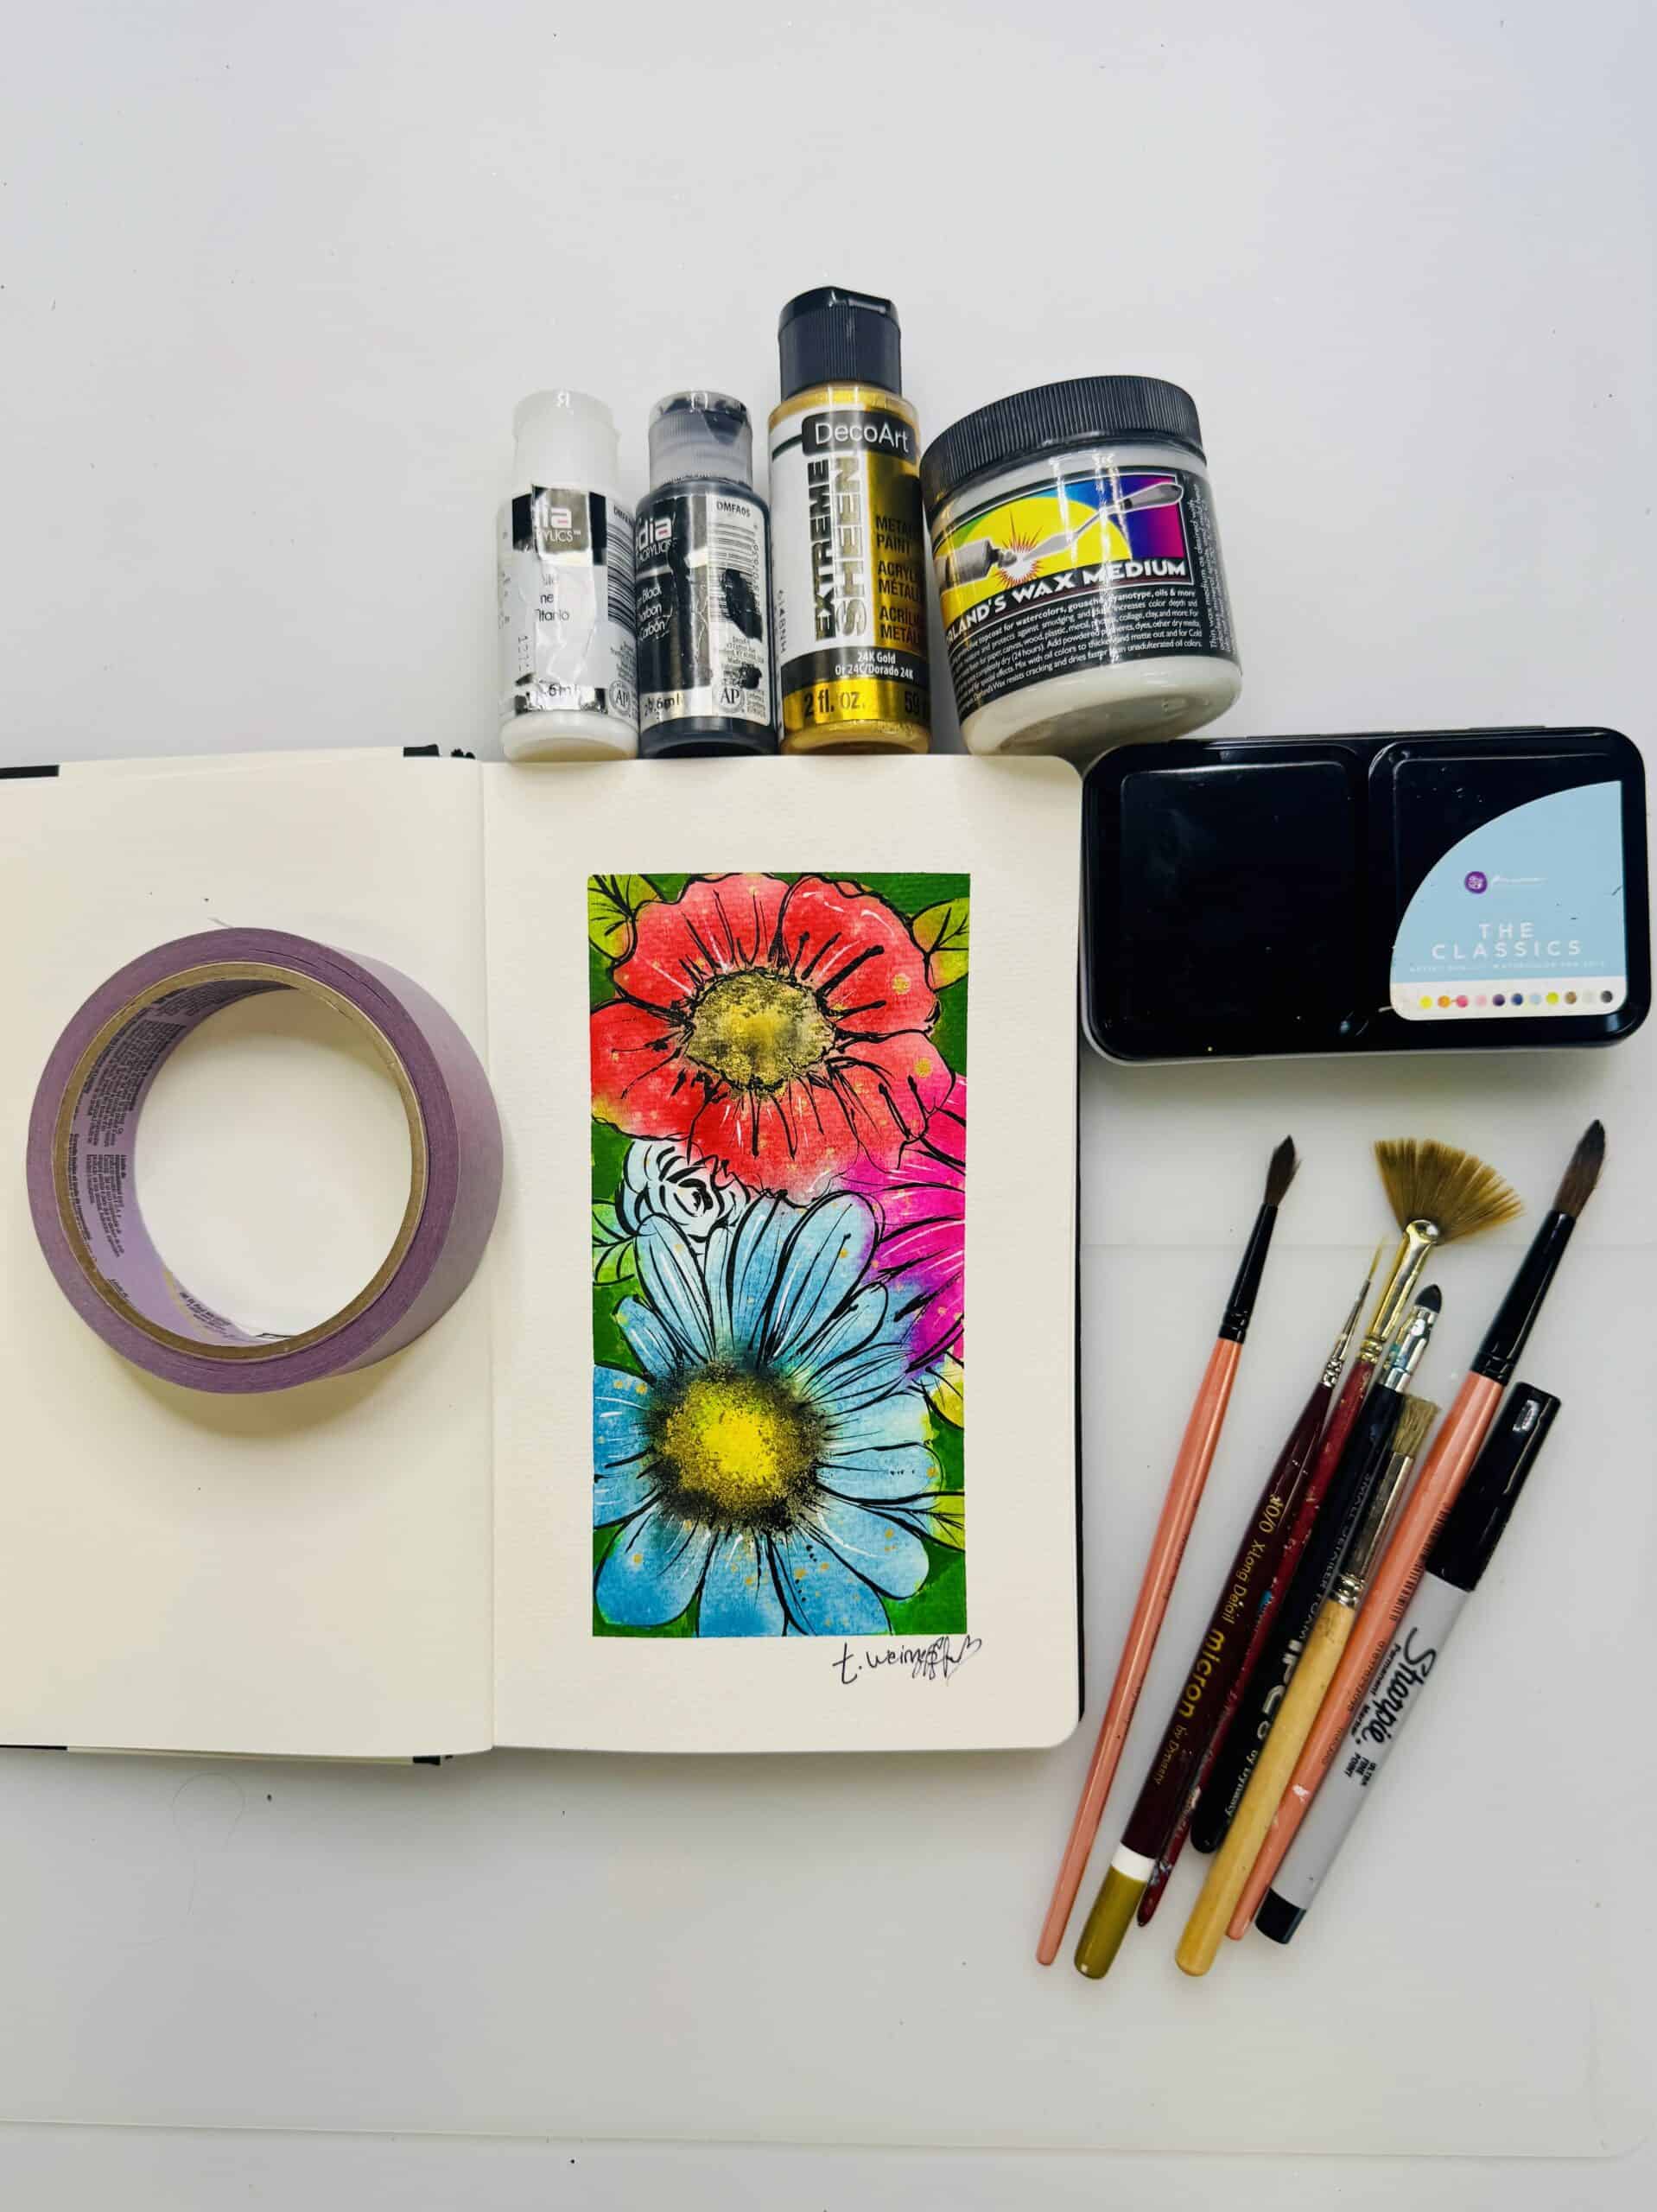
This project is a beautiful exercise in trusting watercolor and creating from the space you are in. You do not need to know exactly where every flower will go before you begin. Start with water, let the colors move, and pay attention to the shapes that begin appearing on the page. The black linework can come later to give those shapes definition.
Most importantly, remember that you do not need hours to create something meaningful. Pull out a brush, make a few marks, and give yourself permission to see where they lead!
Watch the replay below!
Thank you for joining in on the creative fun. Join us LIVE every Wednesday at 5:30 pm PST on Facebook at Tracy Weinzapfel Studios.
Join the waitlist for Your Artful Journey! This is my exclusive creative membership where you can explore the world of art journaling! Join a community of support and inspiration with interactive art sessions full of tips and tricks, conversation, Q & As, and most of all, FUN!
Supply List:
- Decoart Media Fluid Acrylics
- DecoArt Metallics – 24K Gold
- Watercolors: The Classics
- Sealer: Dorland’s Wax
- Brushes – Tracy Weinzapfel Brush Set 2
- Dynasty Stencil Brush
- Dynasty Micron Detail Brush
- Micron Small Detail Round Brush
- Micron Fine Liner Brush
- Foam Detailer
Check out Tracy’s Art Journal Starter Kit!
Tracy’s Resources Page and visit Tracy’s Shop